
'%3e%3cpath%20fill-rule='evenodd'%20clip-rule='evenodd'%20d='M19%208.5C24.799%208.5%2029.5%2013.201%2029.5%2019C29.5%2024.6782%2024.9928%2029.3036%2019.361%2029.4939L19%2029.5C18.8794%2029.5%2018.7592%2029.498%2018.6396%2029.4939L18.2811%2029.4758C12.8174%2029.1063%208.5%2024.5574%208.5%2019C8.5%2013.201%2013.201%208.5%2019%208.5ZM22.3063%2010.6267L22.2342%2010.6539C21.3423%2011.0061%2020.5541%2011.6368%2020.5606%2012.4987C20.5631%2012.8302%2020.869%2014.8871%2020.2141%2014.8486C19.5589%2014.8102%2019.413%2013.8753%2018.7116%2013.616C17.5944%2013.2026%2016.9819%2014.3401%2017.0939%2015.3106C17.1695%2015.9655%2018.9289%2018.3871%2017.9028%2019C17.292%2019.3651%2015.7279%2017.5692%2015.1007%2017.1842C14.4805%2016.8034%2013.2758%2017.3333%2012.4974%2016.7029C11.9874%2016.2899%2012.3881%2014.4098%2012.2786%2013.8372C12.2271%2013.5698%2012.1155%2013.3689%2011.9794%2013.2166L12.0402%2013.2934C10.7653%2014.8464%2010%2016.8339%2010%2019C10%2023.8465%2013.8307%2027.7982%2018.6295%2027.9925L18.6769%2027.9747C18.8597%2027.8677%2019.0394%2027.7557%2019.216%2027.6387C19.4137%2027.4534%2019.5436%2027.2072%2019.5849%2026.9394C19.8806%2025.1222%2018.3616%2025.4302%2017.9367%2024.5622C17.5489%2023.7695%2018.5712%2023.7684%2018.5524%2021.7923C18.4607%2021.1774%2018.5279%2020.547%2018.7211%2020.0315C19.1834%2018.7987%2020.7077%2017.2643%2022.5889%2018.0081C23.5567%2018.3906%2023.1524%2019.9831%2023.4737%2020.3394C24.251%2021.2018%2025.3228%2020.6863%2026.2856%2021.2253C26.7816%2021.5032%2026.9797%2022.41%2027.056%2023.2248L27.038%2023.0528C27.6534%2021.8348%2028%2020.4579%2028%2019C28%2015.1968%2025.6409%2011.9445%2022.3063%2010.6267Z'%20fill='%23757575'/%3e%3ccircle%20cx='19'%20cy='19'%20r='10.125'%20stroke='%23757575'%20stroke-width='2.25'/%3e%3c/g%3e%3cdefs%3e%3cclipPath%20id='clip0_1827_14613'%3e%3crect%20width='24'%20height='24'%20fill='white'%20transform='translate(7%207)'/%3e%3c/clipPath%3e%3c/defs%3e%3c/svg%3e)


Ever watched a video and felt like something was missing, even though the visuals were on point? That “something” is almost always sound. The right audio doesn’t just support your video, it brings it to life. I’ve been in the trenches of video editing long enough to know how painful it can be to find tools that don’t glitch, charge you an arm, or need a whole YouTube tutorial to figure out. That’s why I built this guide, to save you from all that mess. Every tool listed here has been tested, stress-checked, and beginner-approved. If you need to merge audio and video: add narration, background music, or sound effects, this is your straight-up blueprint. I’m also dropping a slick trick using Toolsmart to pull audio straight from YouTube like a pro.

Use Clideo
Clideo is perfect for when you just need to add background music or any audio file to your video quickly. What makes it stand out is that it's online, super beginner-friendly, and works right from your browser,no need to download anything. The interface is clean, and you can upload from your device, Dropbox, Google Drive, or a URL. It supports all major video and audio formats, which means less stress about conversions.

You also get the option to adjust audio volume and preview the final output before saving. If you're learning how to merge videowith background music for the first time, Clideo keeps the process smooth and frustration-free.
Features:
Add audio to video in seconds: You can quickly combine your chosen soundtrack with any video without needing complex editing skills or software installations.
Browser-based and mobile-friendly: Clideo runs entirely online, so you can access it from any device. If you're using a desktop or editing on the go from your phone, this tool might be the best for you.
Supports multiple file formats (MP4, MP3, MOV, etc.): It’s compatible with a wide range of video and audio formats, saving you the hassle of converting files before uploading.
Pros:
Doesn’t require installation.
Works on both PC and mobile.
Simple drag-and-drop interface.
Cons:
File size is limited for free users.
Requires stable internet connection.
No trimming inside the tool, you’ll need a separate editor for that.
Step-by-step guide:
Here’s an easy guide on how to use this tool.
Step 1: Visit the official website of Clideo on your browser.
Step 2: Upload your video file from your device, Dropbox, or a link by clicking the “Choose File”option.

Step 3: Now add audio to your video by clicking the“Add audio” option available on the panel on the right side of your screen. You can also adjust the length of your video by trimming it from the panel below your video.

Step 4: Now simply download the video by clicking the "Export" option on the bottom right of your screen. The video will be automatically downloaded to your device.

Honestly, I loved how fast Clideo was. For something like adding background music to a presentation video, this is the quickest fix. If your files are small and your internet is decent, this one’s golden.
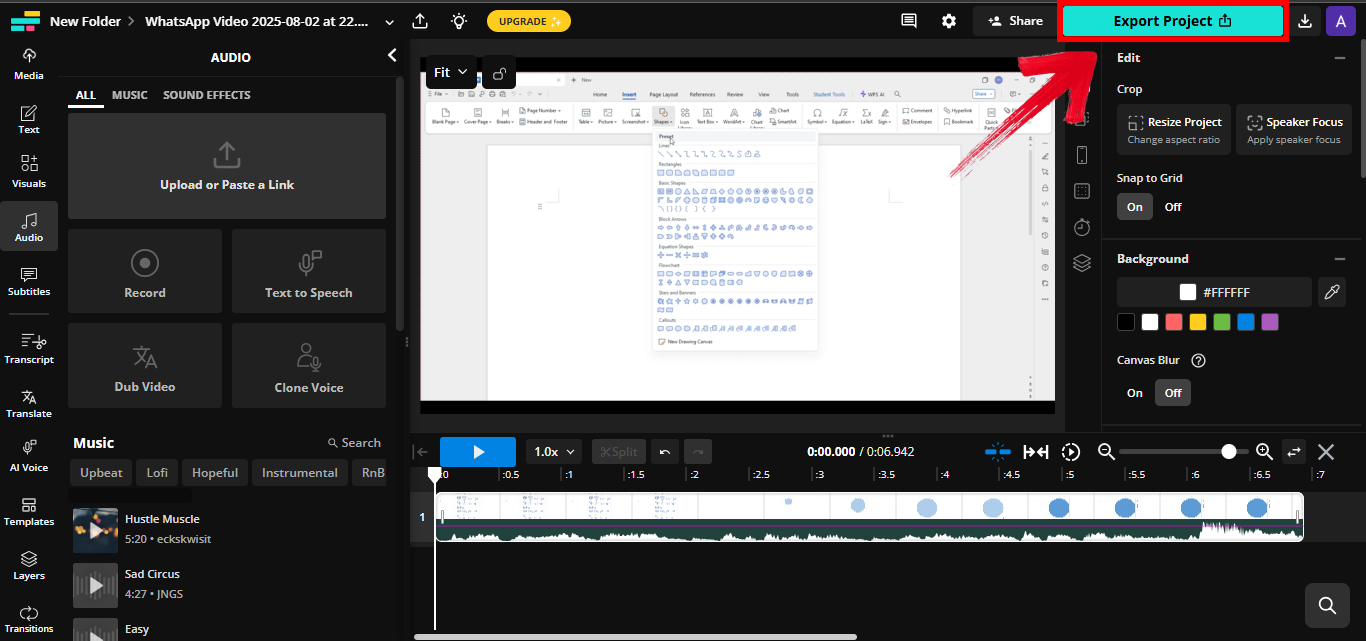
Use Kapwing Video Editor
Kapwingis like your Swiss Army knife for video editing, especially when you're aiming to merge audio and video online. It feels more like a full-blown editor but still keeps things beginner-friendly. It's ideal for social media creators who want more control like adding text, subtitles, trimming, and timing audio just right. You can also layer multiple audio tracks, which is great for combining background music with narration or sound effects.

Collaboration is seamless too, you can share editable project links with your team. If you're wondering how to merge video with background music and also want editing flexibility, Kapwing is a solid pick.
Features:
Full suite of editing tools, including subtitles and filters: Kapwing offers a rich set of features that let you trim, resize, subtitle, filter, and overlay content, all from one easy-to-use platform.
Cloud-based editing and storage: Your projects are saved online, so you can access and edit them from any device without having to worry about losing progress.
Export in HD quality: Even on the free plan, Kapwing allows you to export videos in high definition, making your final product look polished and professional.
Pros:
Great for YouTubers and IG creators.
Real-time audio syncing.
Allows text overlays and subtitles.
Cons:
The free plan adds a watermark.
Requires login for projects longer than 7 mins.
Can lag with large file sizes.
Step-by-step guide:
Step 1: First of all, go to the official website ofKapwingon your browser.
Step 2: Now on the homepage, click "Upload video" to bring in your video file.

Step 3: Once done, tap on the“Audio” tab available on the panel on the left side of your screen, then upload your MP3 or search for audio from the options on the interface.

Step 5: Preview, and then export and download your finished video by clicking the “Export Project” option on the top right of your screen.
I’ve used Kapwing to create Instagram reels with background music, and it delivered big time. The real-time preview makes syncing easier than you’d expect, especially when working with multiple audio layers. Its intuitive interface and precise timing controls helped me produce clean, high-quality videos that matched the pace and mood I was aiming for, without spending hours in post-production.
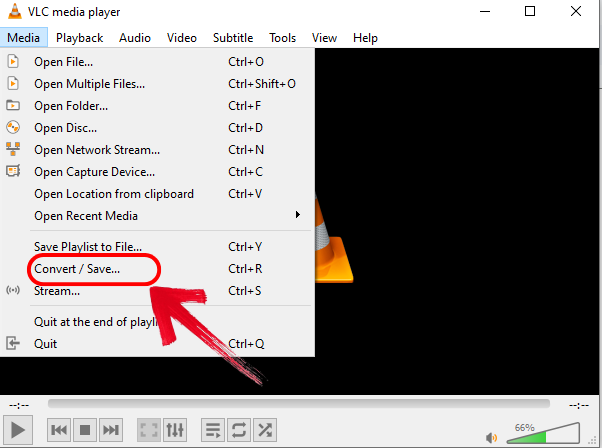
Use VLC Media Player
Believe it or not, VLC isn't just for watching movies. It also lets you merge audio and video offline using its "Convert/Save" feature. It might not be as flashy as other tools, but it’s powerful, reliable, and free. You don’t need an internet connection, which makes it perfect for offline editing situations. VLC also supports nearly every audio and video format imaginable, so compatibility issues are rare. If you're looking for tools to add audio track to video without depending on cloud services, VLC is a dependable option.

While it doesn’t offer real-time previews, it’s incredibly lightweight and won’t slow down your system. Advanced users can even explore VLC’s command-line options for batch processing. Once you get used to the steps, it becomes a go-to utility for quick, no-fuss merging.
Features:
Works entirely offline: VLC functions without any internet connection, making it ideal for situations where online tools aren’t accessible or reliable.
Supports a massive range of formats: From MP4and AVI to FLAC and MKV, VLC can handle almost any audio or video format you throw at it, reducing the need for file conversions.
Converts and merges in one go: You can combine audio and video while simultaneously converting them into your desired output format, streamlining your workflow efficiently.
Pros:
No internet required.
Completely free and open-source.
Cross-platform (Windows, Mac, Linux).
Cons:
The interface isn’t beginner-friendly.
Merging requires multiple steps.
No live preview.
Step-by-step guide:
Step 1: First of all, download and open VLC from this link on your browser: https://www.videolan.org/vlc/
Step 2: Now go on the “Media” tab on the top left of your interface and scroll down to click“Convert/Save.”
Step 3: To add your video, click the“Add” option in the file option on your screen.

Step 4: Once done, go to the “Show More Options” option at the bottom of your interface.

Step 4: Now browse and add your audio track by clicking the “Browse” option beside “Extract Media.”

Step 5: Finally, click the“Convert/Save” option to save your video on your device.

I’ll be honest, VLC isn’t as smooth as online editors, but for offline work, it’s a lifesaver. It’s the best pick for students or travelers with limited internet access.
Use Onlineconverter
Onlineconverteris a simple tool that focuses on one job: inserting or replacing audio in your video. There’s no fluff here, just upload, add audio, and download. It’s especially useful when your video doesn’t need other editing like trimming or effects. The interface is stripped down for speed, which means minimal clicks and fast results. You don’t need to create an account or deal with annoying ads, making it perfect for quick projects.

If you're just trying to combine MP3with video online without diving into complex settings, Onlineconverter gets the job done with ease.
Features:
Audio replace or merge function: You can choose to either completely replace the existing audio in your video or merge the new audio alongside it, depending on what your project needs.
Completely free and web-based: No installations, no sign-ups; just open your browser, upload your files, and you’re good to go, all without spending a dime.
Automatic sync for files of equal length: If your audio and video files are roughly the same duration, the tool aligns them automatically, saving you time and effort in manual syncing.
Pros:
Very straightforward UI.
Doesn’t need account creation.
No watermark.
Cons:
Limited file size.
Not mobile-optimized.
No trimming or timing control.
Step-by-step guide:
Step 1: First of all, go to the official website ofOnlineconverteron your browser.
Step 2: Now first add the video that you want to use by clicking “Choose File” written beside“Video.”

Step 3: Now choose your audio that you want to use by clicking “Choose File” written beside“Audio.”

Step 4: Once done, choose whether to merge or replace audio. Click “Keep Audio in Video” to process the video.

Step 5: Now finally get the video you want by simply clicking the “Convert” option to merge the files and you'll have your video.

It’s not fancy, but sometimes simple wins. I’d recommend this for anyone looking to slap music onto a lecture video or YouTube clip in under 5 minutes. The minimal layout means there’s almost zero learning curve, which makes it perfect for quick, one-off tasks. It’s the kind of tool you bookmark for those last-minute edits when time and simplicity matter most.
Use Videocandy
Videocandybrings modern vibes to simple editing tasks. Its interface feels clean, its features are intuitive, and it's perfect for those just getting started. It lets you merge audio and video, and also offers options like trim, resize, and convert. You can drag and drop your files directly into the browser, which makes setup super quick. It even lets you adjust audio levels so your background music doesn’t overpower the video. There's no watermarkon downloads, which is a big win for casual creators.

If you're wondering how to merge video with background music without needing any editing experience, Videocandy makes it almost effortless.
Features:
Add, trim, and time audio tracks: Videocandy allows you to insert your audio, trim it to fit your video’s length, and time it precisely so the sound lines up exactly how you want.
Works online, no app needed: You don’t need to install anything—just launch the tool in your browser and start editing instantly, no matter what device you're on.
Supports drag-and-drop editing: Uploading is as easy as dragging your video and audio files into the editor, which speeds up the entire process and keeps things user-friendly.
Pros:
Sleek UI and fast performance.
Free to use without login.
Good for short social content.
Cons:
File size restrictions.
No advanced editing.
Needs good Wi-Fi for a smooth experience.
Step-by-step guide:
Step 1: First of all, visit the official website ofVideocandyon your browser.
Step 2: Upload your video from the device by clicking “Add File.”

Step 3: Now upload the audio file by clicking the“ADD BACKGROUND AUDIO” option from the panel on the right side of your screen.

Step 5: Finally, click “EXPORT” on the bottom right of your screen and download.

Videocandy gives Clideo some competition. I really liked the layout, it’s super friendly for someone who just wants the job done fast and clean. The interface responds quickly, and everything feels intuitive even if you're a first-time user. It’s ideal for simple tasks like adding background music without getting lost in menus or tools. For short-form content or class projects, this tool easily holds its own.
Comparison of the Five Tools
With so many options out there, it can be hard to decide which tool fits your needs best, especially if you’re short on time or editing experience. I’ve broken down the five tools we explored based on ease of use, features, and ideal users. This quick comparison should help you make the right pick without second-guessing. If you're trying to combine MP3 with video online and need a side-by-side view, this will clear things up fast.
| Tool | Ease of Use | Free Plan Limitations | Works Offline | Best For |
|---|---|---|---|---|
| Clideo | High | File size cap | No | Quick background audio edits |
| Kapwing | Medium-High | Watermark | No | Social media creators |
| VLC Player | Low | None | Yes | Offline merging |
| Onlineconverter | High | Limited file size | No | Basic merge tasks |
| Videocandy | High | Short videos only | No | First-timers & students |
If you're just starting out, Clideo and Videocandy are hands-down the most beginner-friendly options. For more advanced users or those working offline, VLC offers reliable performance and flexibility. And if you're looking for a full-featured editing experience with more creative control, Kapwing delivers exactly that.
Bonus – Use Toolsmart to Download Audio or Video from YouTube
Sometimes, you already know what audio you want, but it’s sitting on YouTube. That’s where Toolsmart Free Youtube Video Downloader comes in. It’s a free YouTube downloader that lets you grab audio or video with just a link. You can download content in both MP3 and MP4 formats without any watermarks or quality loss. It supports playlists too, so you’re not limited to single clips. The site is lightweight, fast, and doesn’t require you to create an account.

If you're building content and need reliable source material, Toolsmart is easily one of the most efficient tools out there for saving media straight from YouTube. It simplifies your workflow by letting you extract the exact clips you need for voiceovers, music, or visuals. You can use it as a dependable first step before jumping into any editing tool. Students, creators, and marketers alike can count on it for fast, no-nonsense downloads.
Features:
Download in MP3 or MP4: Toolsmart gives you the flexibility to save audio or full videos in the format that best fits your project, without losing quality.
No software required: You don’t need to install anything; just paste the YouTube link into your browser and start downloading instantly.
Supports playlists too: Grab entire YouTube playlists in one go, making it perfect for batch downloading content for longer projects or consistent branding.
Step-by-step guide:
Toolsmart is incredibly easy to use, even if it’s your first time downloading videos, you’ll pick it up instantly. Here’s a quick walkthrough to get you started.
Step 1: Open the video you’d like to download, click on the “Share” option below it, and select“Copy Link” to grab the video’s URL.

Step 2: Then go to the official website of Toolsmart YouTube Downloader on your browser.
Step 3: Then, just drop down the copied link into the source box on your screen.

Step 4: Once done, click the“Download” button, and you’ll see a list of available resolution choices appear underneath.

Step 5: Choose your preferred video resolution, then click the “Download” button beside it to start saving the file.

This tool’s a gem. I often use Toolsmart to extract podcast clips or background scores that I later layer onto my edits. It's quick, dependable, and fits seamlessly into my content creation routine. Pair it with Kapwing or Clideo, and you’ve got a full workflow from sourcing to final export, all without touching a single app download.
FAQs
Q1: Can I merge audio and video without downloading software?
Yes. Use online tools like Clideo, Kapwing, or Videocandy straight in your browser.
Q2: Which formats are supported?
Most tools support MP4 for video and MP3 or WAV for audio.
Q3: How can I match audio length to video?
Use built-in trim features in editors like Kapwing or external apps like Audacity.
Crafting the Perfect Blend of Audio and Video in 2025
To wrap it up, learning how to merge audio and video doesn’t have to be a headache. With the right tool, you can combine MP3 with video online or add audio tracks seamlessly. From Clideo’s quick interface to VLC’s offline flexibility, there's a tool here for every kind of creator. Don’t forget Toolsmart Free Youtube Video Downloader, it can really come in handy when your perfect audio clip is just a link away. Dive in, try a few out, and see which tool fits your style best.


