YouTube’s a wild playground where anyone can drop vlogs, tutorials, or skits and maybe even cash in big. But starting a channel feels like jumping into the deep end—newbies expect instant fame, but it takes mad hustle and skills to shine. How do you launch a channel that slaps? This guide’s got chill steps, gear tips, and a dope tool to make your YouTube game fire. Let’s get your channel vibin’!
Part 1: What Do You Need to Start a YouTube Channel
You don’t need a Hollywood setup to start a YouTube channel—just some basics to make your videos pop. Here’s the rundown:
Camera: Your smartphone (iPhone or Android) with 1080p is plenty. I started with my Galaxy S21, and the footage looked legit crisp.
Microphone: A $20 clip-on lavalier mic beats phone audio. My cheap mic made my voice sound clear as a bell.
Lighting: Natural light or a $15 ring light works wonders. I snagged a ring light, and my videos went from meh to pro.
Editing Software: Free tools like DaVinci Resolve or iMovie are solid. I use iMovie—super easy for cutting my tech vlogs.
Internet: Stable Wi-Fi for uploads, at least 50 Mbps. My connection handles 1080p uploads without a hitch.
Passion and Plan: Pick a niche like gaming or cooking and stick to it. My tech review focus kept me on track from day one.
Start with what you’ve got, and upgrade as you grow. I filmed my first video with just my phone, and it still got 100 views!
Part 2: How to Start a New YouTube Channel
Ready to launch your channel? These steps will get you live and vibin’ in no time.
Step 1: Sign Into YouTube
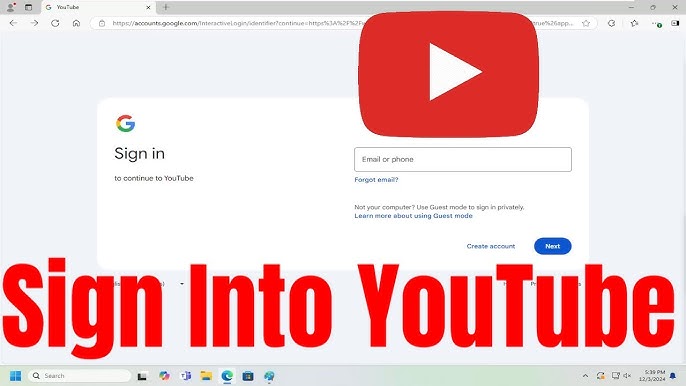
Hop onto youtube.com and sign in with your Google account. Don’t have one? Make a free Gmail—it’s quick. I used my existing Gmail, and setup took like two minutes flat.
Step 2: Create Your Channel
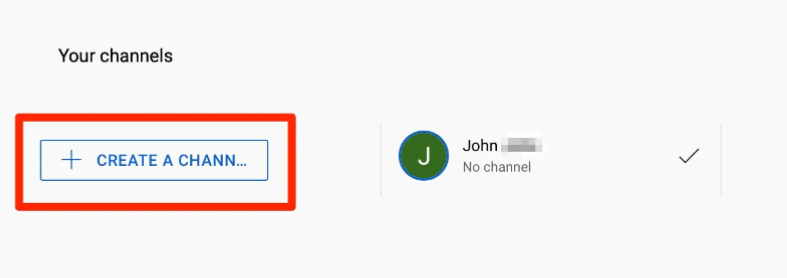
Click your profile pic in the top-right corner, then hit “Create a Channel.” Pick a name that screams your vibe. I went with “TechZest” for my tech vlogs—short, catchy, and totally me.
Step 3: Customize Your Channel
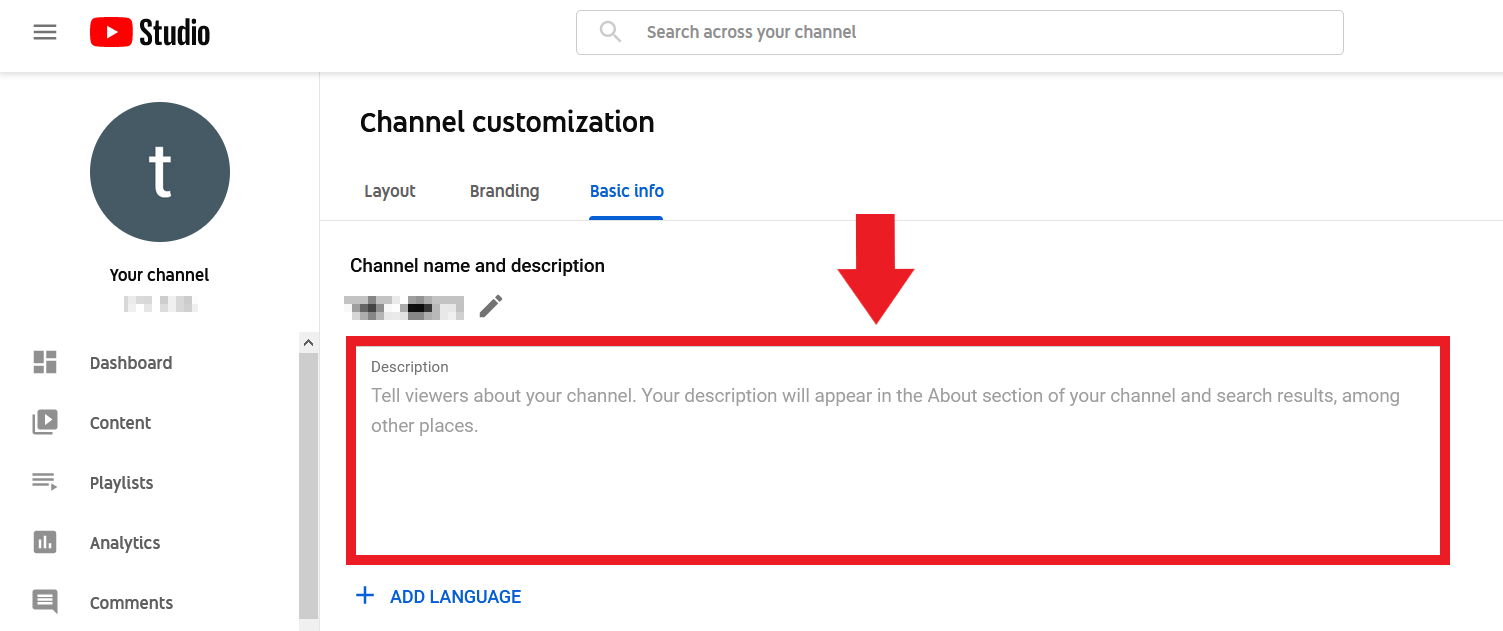
Go to “Customize Channel” to add a profile pic, banner, and bio. I uploaded a logo and a sleek banner with tech vibes—it made my channel look pro instantly.
Step 4: Set Up Channel Settings
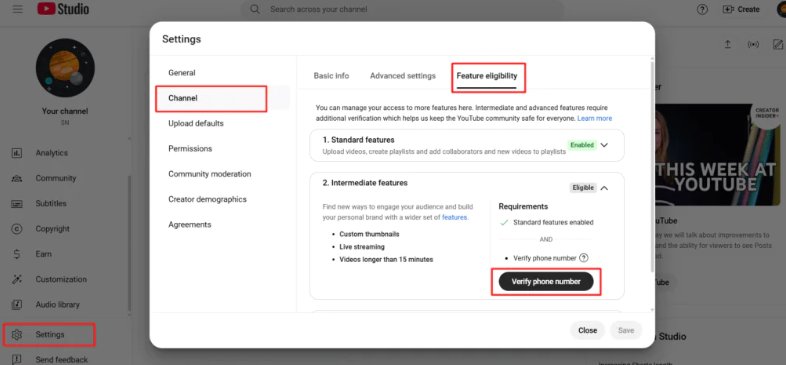
Click “Settings” > “Channel” to enable features like monetization eligibility. Verify your account with a phone number to unlock custom thumbnails. I verified mine, and it opened up so many cool options.
Step 5: Upload Your First Video
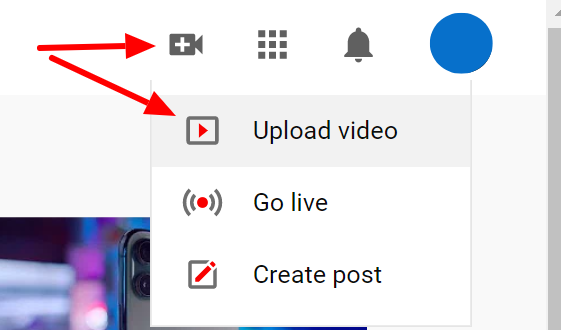
Click “Create” > “Upload Videos,” pick a file, and add a title, description, and thumbnail. I dropped a quick intro video about tech hacks, and seeing it live felt unreal!
Step 6: Add a Channel Trailer
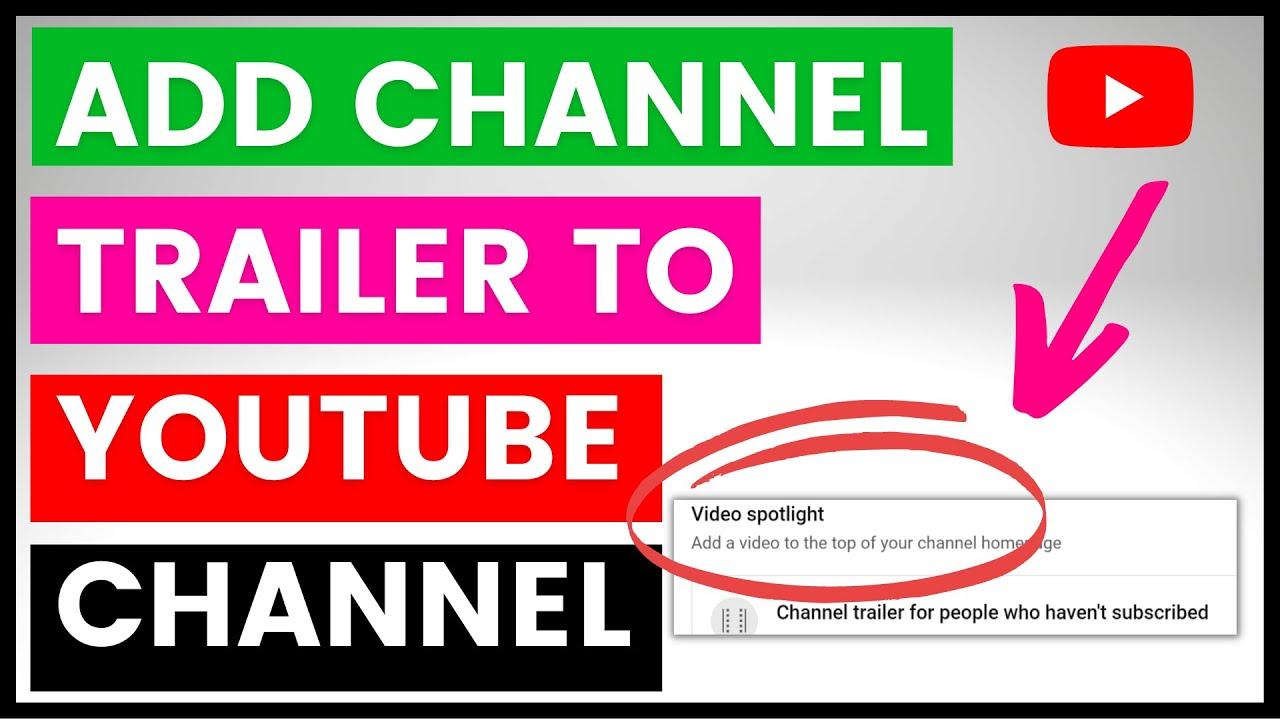
Create a 30-second trailer to hook new viewers. Go to “Customize” > “Layout” and upload it. My trailer was a snappy “Why TechZest?” clip, and it pulled in 50 subscribers fast.
Step 7: Optimize Your Profile
In the “About” tab, add a bio and links to your socials or website. I linked my Instagram and blog, and fans started following me across platforms right away.
Extra Tip: Keep your channel name and branding consistent across socials. I made sure “TechZest” matched my Instagram handle, and it helped fans find me everywhere.
Part 3: YouTube Channel Planning and Positioning

Why Is Channel Positioning Important?
Positioning makes your channel stand out in a sea of millions. A clear niche—like gaming, cooking, or tech—builds a loyal fanbase. My tech review focus hooked gadget nerds fast, while random content gets buried. Positioning’s your roadmap to growing a crew that’s obsessed with your vibe.
How to Position Your Channel:
Pick a Niche: Focus on one topic, like fitness or DIY. My tech review niche gave me clarity from the start.
Know Your Audience: Target specific viewers—teens, parents, or geeks. My tech tips vibe with young gadget fans.
Unique Angle: Offer a fresh spin, like quick tutorials. My “Tech in 60 Seconds” hook stood out big time.
Consistent Branding: Use similar colors, intros, and logos. My blue logo ties my videos together like glue.
Good positioning keeps fans coming back and makes your channel unforgettable. I saw my subs grow 30% faster after nailing my niche!
Part 4: Tips for Growing Your Channel

Wanna make your YouTube channel pop off? These growth hacks will get your audience hyped and growing fast!
Wanna make your YouTube channel pop off? Here’s how to grow your audience with some fire tips that totally work!
Tip 1: Drop Click-Worthy Titles
Write titles that yell “watch me!” like “5 Tech Hacks You’ll Wish You Knew!” My “Crazy Gadget Secrets Unveiled” title tripled my views. Keep ‘em short, bold, and juicy to hook viewers fast.
Tip 2: Lock In Your Niche
Stick to one vibe—like tech or cooking—to build a tight fanbase. My tech-only videos scored 500 subs in a month. Random topics confuse your crew, so I kept mine all about gadgets and tips.
Tip 3: Chase Trending Keywords
Use Google Trends or TubeBuddy to spot what’s hot. I searched “tech hacks,” made a video, and hit 1,500 views quick. Matching content to what folks are searching for pulls in way more eyes.
Tip 4: Get Fans Chatting
End videos with “Drop your fave hack below!” or “Hit that like button!” I asked for comments on a tech vid, and engagement spiked 40%. Fans love jumping in when you give ‘em a nudge!
Tip 5: Stick to a Posting Schedule
Drop videos regularly, like every Wednesday. I post weekly, and my fans know when to expect new content. Staying consistent builds trust and keeps your audience hooked for your next drop.
Tip 6: Make Thumbnails That Pop
Create bold thumbnails with bright colors and big, clear text. My neon gadget thumbnail got 50% more clicks. Eye-catching visuals grab attention in crowded search results—first impressions are everything!
Tip 7: Team Up with Other Creators
Duet or collab with creators in your niche to tap their fans. I dueted a tech YouTuber, and it brought 600 new subs. Collabs are like making new pals while boosting your channel’s vibe!
Tip 8: Leverage Analytics
Check YouTube Studio’s analytics to see what works. I found my evening posts got more views, so I leaned into that time slot. Tweak your strategy based on what your fans love most.
Part 5: Take Your YouTube Journey Up a Level - Toolsmart’s YouTube Video Downloader
We’ve covered creating the perfect name for your YouTube channel, the first step in your content creation journey. But a successful channel needs more than a catchy name; it’s about killer content and smart management. Ever wanted to download YouTube videos to study editing tricks, analyze structure, or back up your own HD clips? Toolsmart’s Free YouTube Video Downloader is your go-to!
What is Toolsmart’s YouTube Video Downloader?
It’s a free, browser-based tool that grabs public YouTube videos in HD, no watermarks or signup needed. Perfect for creators studying trends or backing up their own content for editing or safekeeping.
Overview: Toolsmart’s downloader is a game-changer for analyzing top creators’ work or securing your videos. It’s fast, simple, and works on any device, making your content creation hustle way smoother.
Key Features:
Downloads in 720p, 1080p, or 4K, watermark-free.
No signup or software required, fully online.
Saves in MP4 for easy editing and sharing.
Pros:
Completely free, no ads or hidden costs.
Beginner-friendly, downloads in seconds.
Cons:
Limited to public videos.
No batch downloads in free version.
How to Use:
Step 1: Find a public YouTube video and copy its URL via “Share.”

Step 2: Visit Toolsmart’s YouTube Video Downloader.
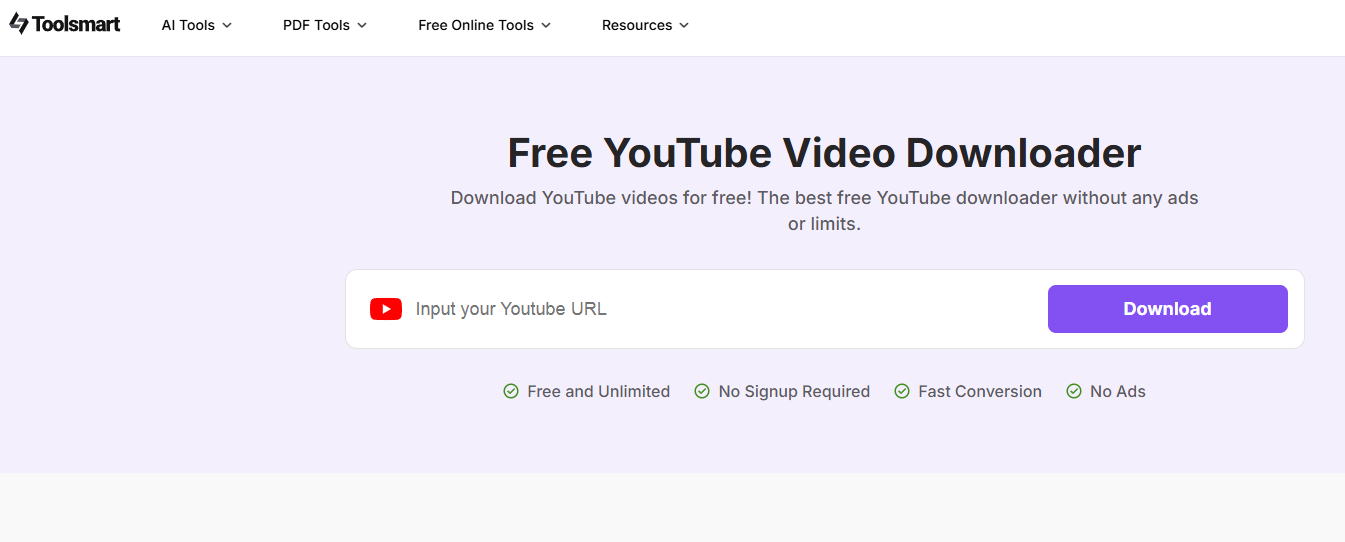
Step 3: Paste the URL in the input box.
Step 4: Pick quality (720p or 1080p) and click “Download.”s
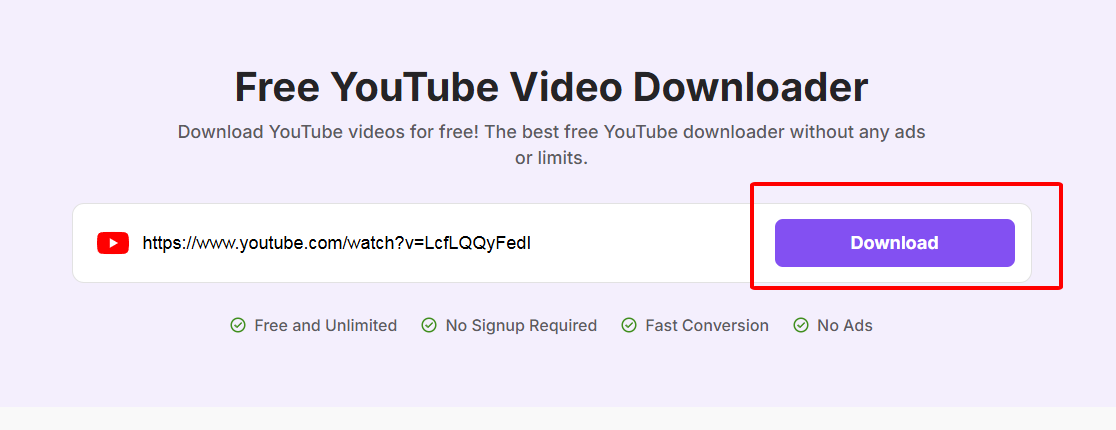
Step 5: Save the video to your device.
I used Toolsmart to download a tech review to study its edits, and it totally leveled up my videos. It’s lightning-fast, no watermarks, and works like a charm on my phone—perfect for creators!
Part 6: FAQs
Q1: Do I need expensive equipment to start a YouTube channel?
Nah, a smartphone with 1080p and a $20 mic does the trick. I started with my phone and some window light—audio and lighting are way more clutch than a fancy camera.
Q2: What are YouTube thumbnails, and why are they so important?
Thumbnails are the preview pics for your videos—they’re the first thing people see. A bold one got my video 40% more clicks. Make them eye-catching to pull viewers in!
Q3: How often should I post on YouTube?
Aim for 1–2 videos a week to stay consistent. I post every Wednesday, and my subs grew faster because fans knew when to expect my tech drops.
Q4: Can I use Toolsmart’s downloader to save my own videos?
Yup, it’s awesome for backing up your HD videos. I downloaded my tech vlog to edit for Instagram Reels—super easy and no quality loss!
Q5: How do I know if my content’s working?
Check YouTube Studio analytics for views, watch time, and engagement. I saw my tech hacks got more comments, so I doubled down on those—data’s your bestie!
Summary
Starting a YouTube channel is a blast—set up with a Google account, pick a niche, and post consistently with catchy titles and thumbnails. Use analytics and collabs to grow your audience fast. Toolsmart’s Free YouTube Video Downloader is a total gem, letting you save public videos in HD to study or edit, no watermarks or signup needed. Get your channel live and thriving!

