
'%3e%3cpath%20fill-rule='evenodd'%20clip-rule='evenodd'%20d='M19%208.5C24.799%208.5%2029.5%2013.201%2029.5%2019C29.5%2024.6782%2024.9928%2029.3036%2019.361%2029.4939L19%2029.5C18.8794%2029.5%2018.7592%2029.498%2018.6396%2029.4939L18.2811%2029.4758C12.8174%2029.1063%208.5%2024.5574%208.5%2019C8.5%2013.201%2013.201%208.5%2019%208.5ZM22.3063%2010.6267L22.2342%2010.6539C21.3423%2011.0061%2020.5541%2011.6368%2020.5606%2012.4987C20.5631%2012.8302%2020.869%2014.8871%2020.2141%2014.8486C19.5589%2014.8102%2019.413%2013.8753%2018.7116%2013.616C17.5944%2013.2026%2016.9819%2014.3401%2017.0939%2015.3106C17.1695%2015.9655%2018.9289%2018.3871%2017.9028%2019C17.292%2019.3651%2015.7279%2017.5692%2015.1007%2017.1842C14.4805%2016.8034%2013.2758%2017.3333%2012.4974%2016.7029C11.9874%2016.2899%2012.3881%2014.4098%2012.2786%2013.8372C12.2271%2013.5698%2012.1155%2013.3689%2011.9794%2013.2166L12.0402%2013.2934C10.7653%2014.8464%2010%2016.8339%2010%2019C10%2023.8465%2013.8307%2027.7982%2018.6295%2027.9925L18.6769%2027.9747C18.8597%2027.8677%2019.0394%2027.7557%2019.216%2027.6387C19.4137%2027.4534%2019.5436%2027.2072%2019.5849%2026.9394C19.8806%2025.1222%2018.3616%2025.4302%2017.9367%2024.5622C17.5489%2023.7695%2018.5712%2023.7684%2018.5524%2021.7923C18.4607%2021.1774%2018.5279%2020.547%2018.7211%2020.0315C19.1834%2018.7987%2020.7077%2017.2643%2022.5889%2018.0081C23.5567%2018.3906%2023.1524%2019.9831%2023.4737%2020.3394C24.251%2021.2018%2025.3228%2020.6863%2026.2856%2021.2253C26.7816%2021.5032%2026.9797%2022.41%2027.056%2023.2248L27.038%2023.0528C27.6534%2021.8348%2028%2020.4579%2028%2019C28%2015.1968%2025.6409%2011.9445%2022.3063%2010.6267Z'%20fill='%23757575'/%3e%3ccircle%20cx='19'%20cy='19'%20r='10.125'%20stroke='%23757575'%20stroke-width='2.25'/%3e%3c/g%3e%3cdefs%3e%3cclipPath%20id='clip0_1827_14613'%3e%3crect%20width='24'%20height='24'%20fill='white'%20transform='translate(7%207)'/%3e%3c/clipPath%3e%3c/defs%3e%3c/svg%3e)


Advanced scheduling is a life-saver for all of us managing a LinkedIn presence. I get that, balancing brand presence, engagement, and consistency can feel like a full-time job. That’s why I’m going to take you through how to see scheduled posts on LinkedIn and run them like a pro. You’ll learn how to edit or delete scheduled posts, too, all while enhancing your visuals with a free tool powered by AI. So let’s get right to it.

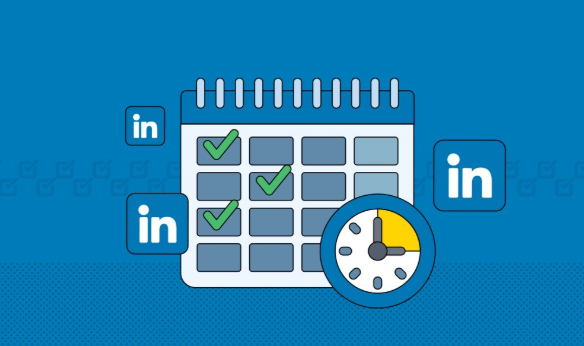
Why See Scheduled LinkedIn Posts?
It is not merely a case of keeping track of your scheduled LinkedIn posts, but having a level of control. If I’ve got something that I’ve scheduled, I’d like to be able to know how to see scheduled posts on LinkedIn for what I intended. You might need to switch a date, fix a typo, or alter your messaging from a new piece of information. This is where learning how to view scheduled posts on LinkedIn can be useful.
It also helps you stay proactive rather than reactive with your content strategy. By reviewing what’s in the pipeline, you can make sure each post aligns with your current goals. Plus, it allows for timely collaboration and approvals from team members if needed. And if plans change, knowing how to delete scheduled posts on LinkedIn ensures you maintain control over what gets published.
Don't wait till the last minute: Sometimes we notice typos or better phrasing after we've posted. It is okay to go back.
Align with trending themes: If your planned post fails to align with the ongoing talk anymore, you can rework it.
Follow campaign schedules: Companies frequently plan several posts before a product launch or event.
Collaborate well: If you're a member of a marketing team, running through upcoming posts can help everyone be on the same page.
I previously scheduled LinkedIn content weekly for an edtech company. Having the capacity to immediately pull up and revise posts prevented us from several potential missteps, most particularly promotions.
How to Schedule Linkedin Posts for Free?
In order to see scheduled posts, we first need to learn how to initially schedule them. Both mobile and desktop support scheduling featuresfor LinkedIn. Let us discuss this step-wise, depending on the devices. Once a post is scheduled, users can manage and review it from their scheduled posts list.
It's also important to understand how to edit scheduled posts on LinkedIn in case updates are needed. This ensures your content remains relevant and timely before it goes live.
Situation 1: Using Desktop
Desktop scheduling and viewing scheduled posts are easy, but a couple of clicks are required. This is how to perform them:
To schedule a post:
To schedule a post on LinkedIn, you’ll need to follow these few quick steps depending on your device.
Step 1: First of all, sign in to LinkedIn and visit your homepage.

Step 2: Now, simply click on “Start a post” on the interface to begin a new post.

Step 3: Then input your content in the box (text, image, hashtags, etc.)

Step 4: Once you're done writing the post, click on the small clock icon towards the left of “Post”. This is the scheduling feature.

Step 5: Choose your desired date and time. Click“Next” to proceed, then click“Schedule”.

To view scheduled posts:
To view scheduled posts, LinkedIn provides a simple way to access and manage your upcoming content. Here's how to do it:
Step 1: Firstly, click on “Start a post” on the interface to begin a new post.
Step 2: Now click on the small clock icon towards the left of “Post”. This is the scheduling feature.
Step 3: Scroll down and simply click “View all Scheduled posts”.

Step 4: Your scheduled posts appear here. Click on any of them to preview, edit, or delete.

I once overlooked a vital typo on a scheduled post while doing a personal branding project. I was able to identify it on time through this feature before the post was publicly released.
Situation 2: Using Cell Phone
The LinkedIn mobile application even lets you schedule your posts, but bringing them back later is a bit involved.
To post a schedule:
To post a schedule on LinkedIn, make sure your content is ready and follow the platform’s built-in scheduling options.
Step 1: Firstly, open the LinkedIn app, and tap on the “Post” icon.

Step 2: Write your post just as you would normally.

Step 3: Now, click on the clock icon on the top right of the post editor.

Step 4: Put in your preferred date and time, click“Next” and then click “Schedule.”

To view scheduled posts:
To view scheduled posts on LinkedIn, you can easily access them through your post composer or content dashboard.
Step 1: Firstly, open the LinkedIn app, and tap on the “Post” icon.
Step 2: Now, click on the clock icon from the top right of the post editor.
Step 3: Now, on the scheduling interface, click“View all” to see all scheduled posts.

Step 4: Your scheduled posts will appear here, if there are any.

I frequently compose articles for linkedin on mobile while commuting, but later revise and schedule them properly on a desktop. It’s a handy workflow while working on multiple tasks simultaneously.
Complimentary Tool: Toolsmart’s Free Image Enhancer
Since we now know where to find scheduled posts on LinkedIn, it’s time to discuss visuals. A good image can be the difference between your post being seen or not seen. I’ve, at times, had some incredible post ideas, but the picture never quite fit the vibe, fuzzy, low-res, or uninteresting. That was when I discovered the Free Image Enhancer from Toolsmart. This isn’t your typical complexphoto editor; it’s a lightweight, AI-powered enhancer designed with everyday users in mind.

You don’t need Photoshop skills or hours of editing; just upload and go. It’s especially effective for sharpening visuals, adjusting lighting, and making your images pop on social media. Whether you're prepping content for LinkedIn or any other platform, this tool helps you stand out effortlessly. If you want polished visuals without the learning curve, this is the smart shortcut.
LinkedIn banners
Headshots
Screens of presentation
Product images
Event promotions
You can insert any image and the AI will refine, illuminate, and upsize it, all in a few seconds.
Key Features:
AI Sharpening: Automatically sharpens fuzzy edges and fine lines.
Color correction: Exposure and saturation balancing corrections of flat images.
Upscaling resolution: Sharply resizes your images without pixelation.
Free for life: No card, no watermark.
Pros:
Extremely newbie-friendly interface
Rapid processing with discernible improvements
No need for software download
Operates on mobile and desktop browsers
How to Use Toolsmart's Free Image Enhancer:
Step 1: First of all, navigate to the official website of Toolsmart Free Image Enhancer on your browser.
Step 2: Click “Upload Image” and select the photo you’ve just finished editing with Picwand, YouCam, or any other app.

Step 3: Wait a few seconds. The AI will automatically enhance sharpness and colors. You’ll see a side-by-side preview.

Step 4: Click “Download” to save your enhanced photo without any watermark.

My project: I fine-tuned a fuzzy headshot of a virtual conference ad speaker. It was converted from a fuzzy headshot to a professional studio photo.
FAQs
Q1: How often can I utilize the free image enhancer of Toolsmart to enhance images?
Yes! It is absolutely free and includes unlimited upgrades.
Q2: What kind of images can I enhance through this tool?
You can stylize portraits, landscapes, images of products, event banners, or even screenshots of meetings.
Q3: Do I have to enroll to utilize this instrument?
Yes. No login or account is required for use of core features of Toolsmart.
Q4: Does Toolsmart leave a watermark?
No way. Your clean images are professional and clean, no branding.
Q5: Is it mobile-friendly?
Yes. It can be viewed via any mobile phone web browser.
Optimizing Your LinkedIn Scheduling Workflow for Maximum Impact
In this tutorial, I walked you through how to see scheduled posts on LinkedIn, on the desktop site, including the new interface, and on mobile devices, and editing or deleting them when necessary. I even briefly mentioned my personal recommendation for augmenting post visuals prior to scheduling, which is Free Image Enhancer from Toolsmart. If for professional purposes, you are serious about having well-created LinkedIn content, a mix of scheduling with high-quality images will see your content reach new heights.


