Instagram isn’t just a social space anymore, it’s your portfolio, your brand’s voice, or the digital scrapbook of your life. But if we’re being honest, posting daily is wearying. You’ve got captions to write, hashtags to research, and then there’s that awful moment when you miss the perfect posting window because, well, life happened. The bottom line is, staying consistent takes more time than most of us can spare. So in this guide, I’ll show you how to schedule posts on Instagram so you can plan ahead and stay present.
Can You Schedule Instagram Posts in Advance?
Yes, absolutely but I quickly realized there are a few conditions. You can’t schedule a post on Instagram with a personal account. I had to switch to a Creator account first, and then eventually to a Business account to unlock features like auto-publishing. That’s when things really started to fall into place. I wasn’t the only one figuring this out, just scroll through any Instagrammarketing thread and you’ll see people handling multiple accounts and formats, all searching for a simpler, smoother process.
People have to realize that scheduling on Instagram isn’t as simple as tapping a button as there are a few key things you need to have in place first. Without the right account type and setup, most scheduling tools (even Instagram’s own) won’t work the way you expect. Here’s what you need to get started:
A Business account (not Personal or Creator)
A linked Facebook Page connected to your Instagram
Access to Meta Business Suite or a trusted third-party scheduler
Auto-publishing only works for regular posts and Reels, not Stories
Stories still require manual confirmation in most tools
With a Business account and Meta Business Suite set up, I finally had the tools to plan posts ahead. What came next was figuring out how to schedule posts on Instagram in a way that felt smooth, stress-free, and genuinely manageable even on busy days.
How to Schedule Posts on Instagram (Free & Official Method)
I used to think scheduling Instagram posts was just for big brands, but once I started managing multiple drafts, time zones, and reminders, I realized it was a game changer for anyone trying to stay consistent. Instead of scrambling at the last minute, I now map out my posts in advance, adjust the visuals and captionswhen I’m in the right headspace, and let the scheduler handle the rest. Here’s how I do it and how you can too.
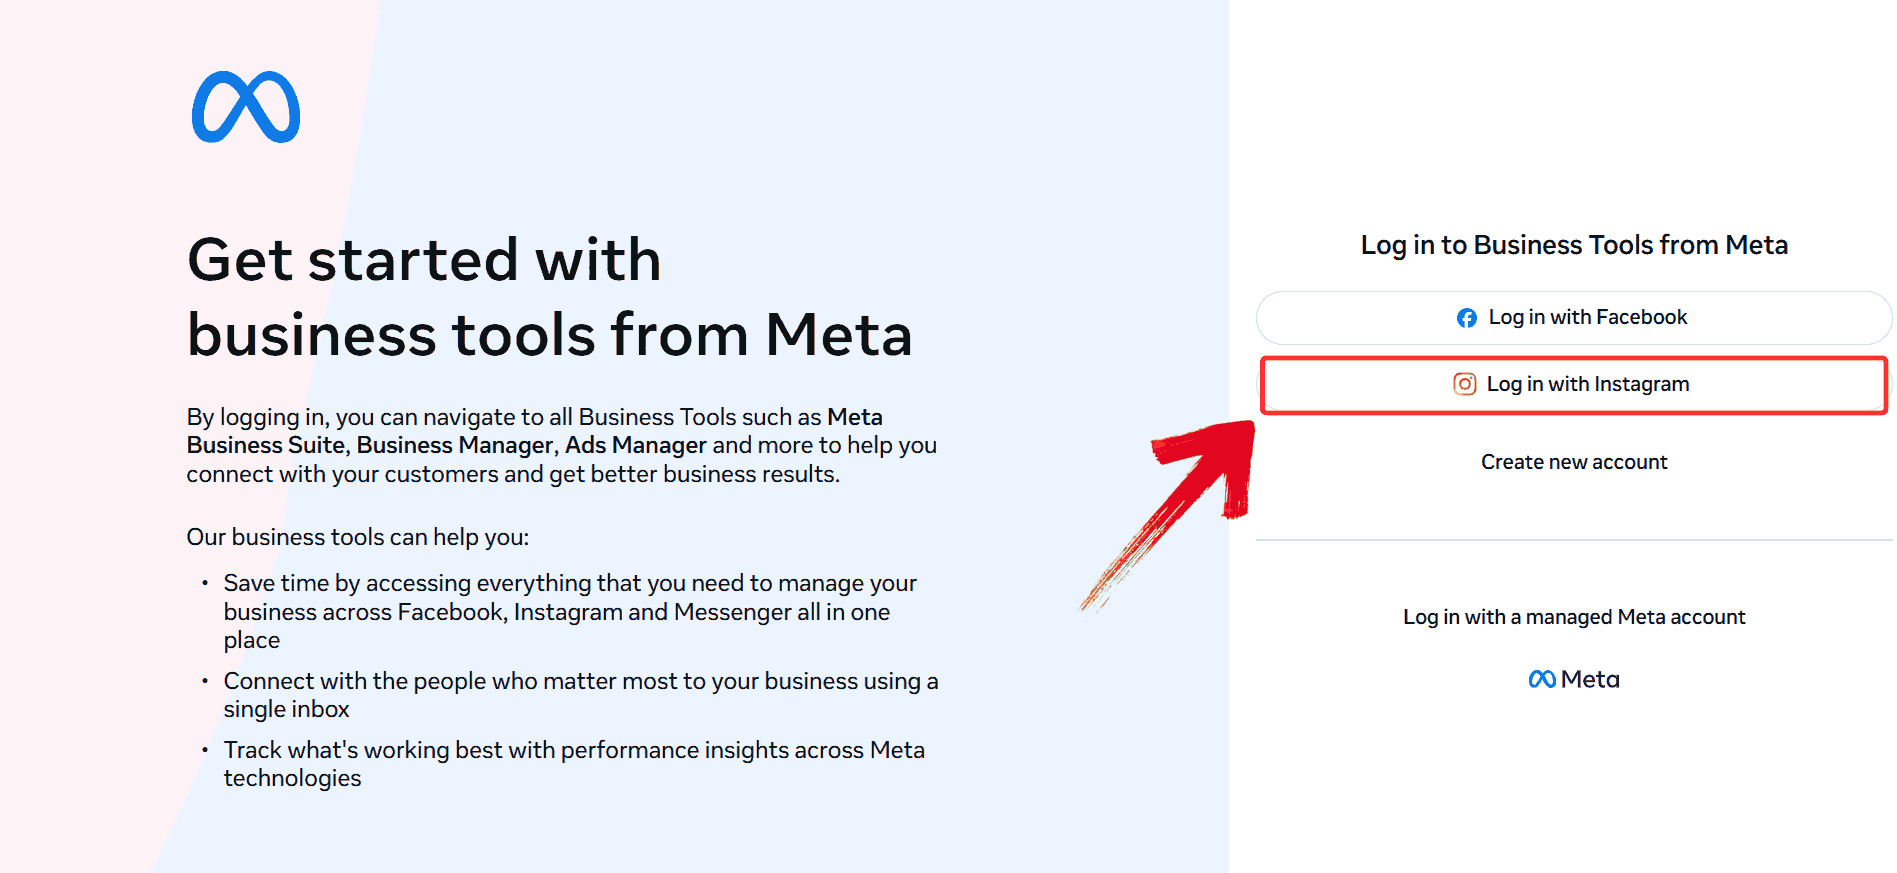
Step 1: Head over to the Meta Business Suite and click on “Log in with Instagram” to log into your account.
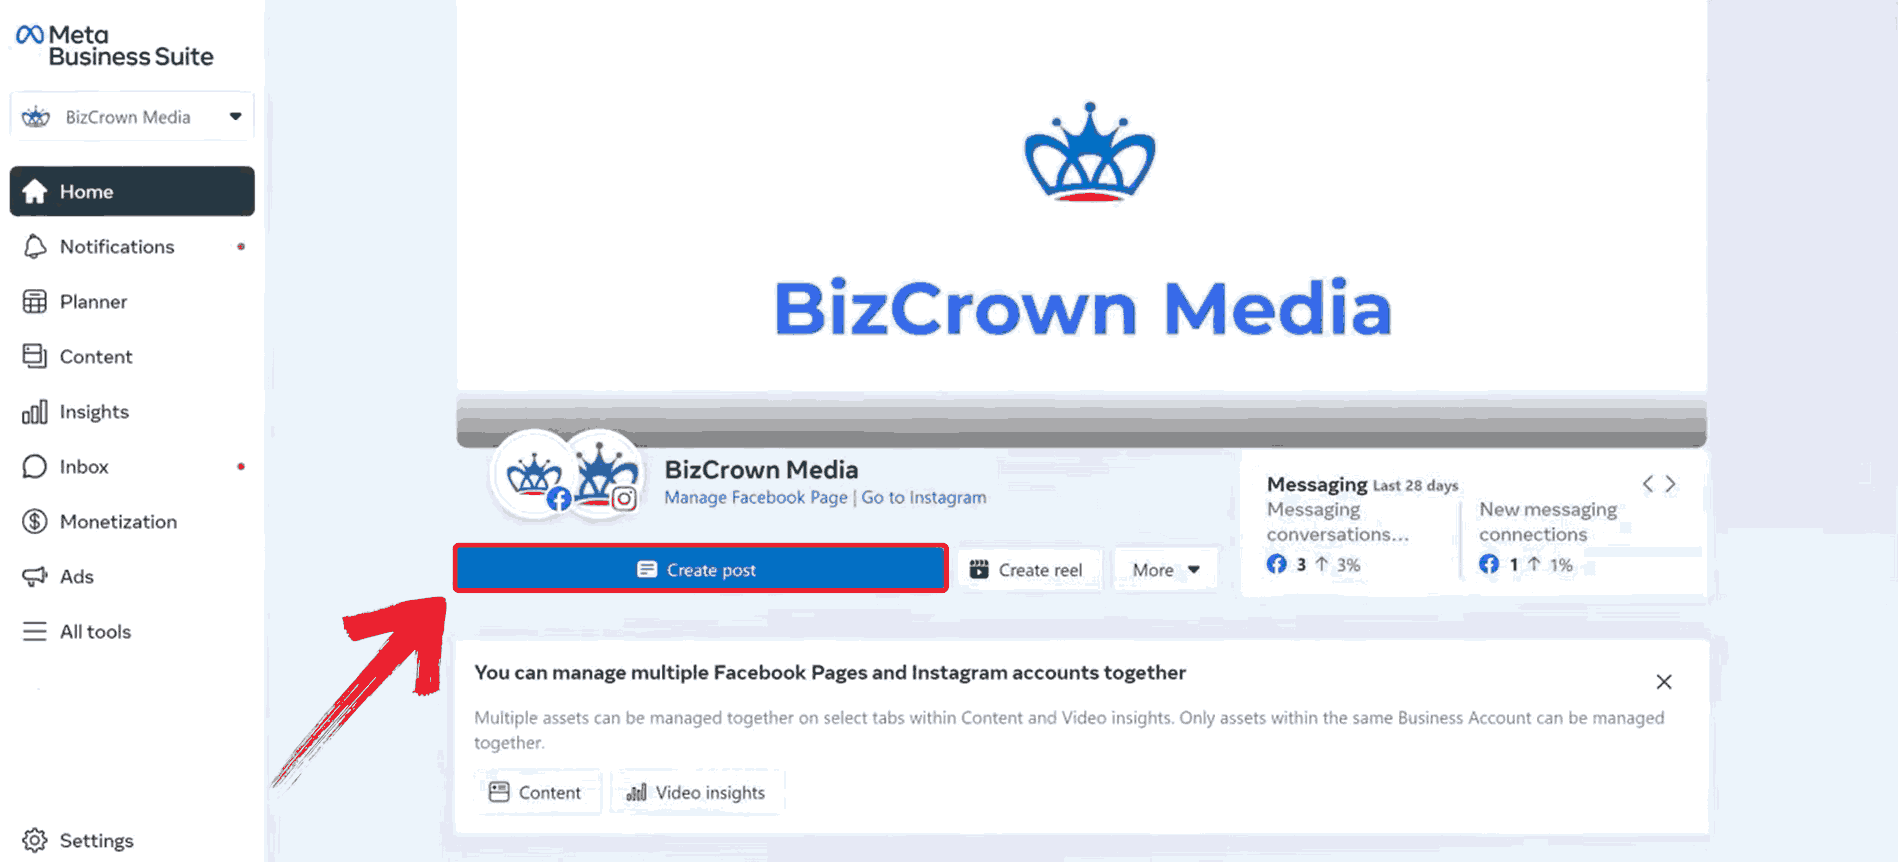
Step 2: Click on “Create Post”. This will open up the post composer where you can draft your Instagram content.
Step 3: Add your content by typing out your caption in the text box and uploading a photo or video to go with your post.
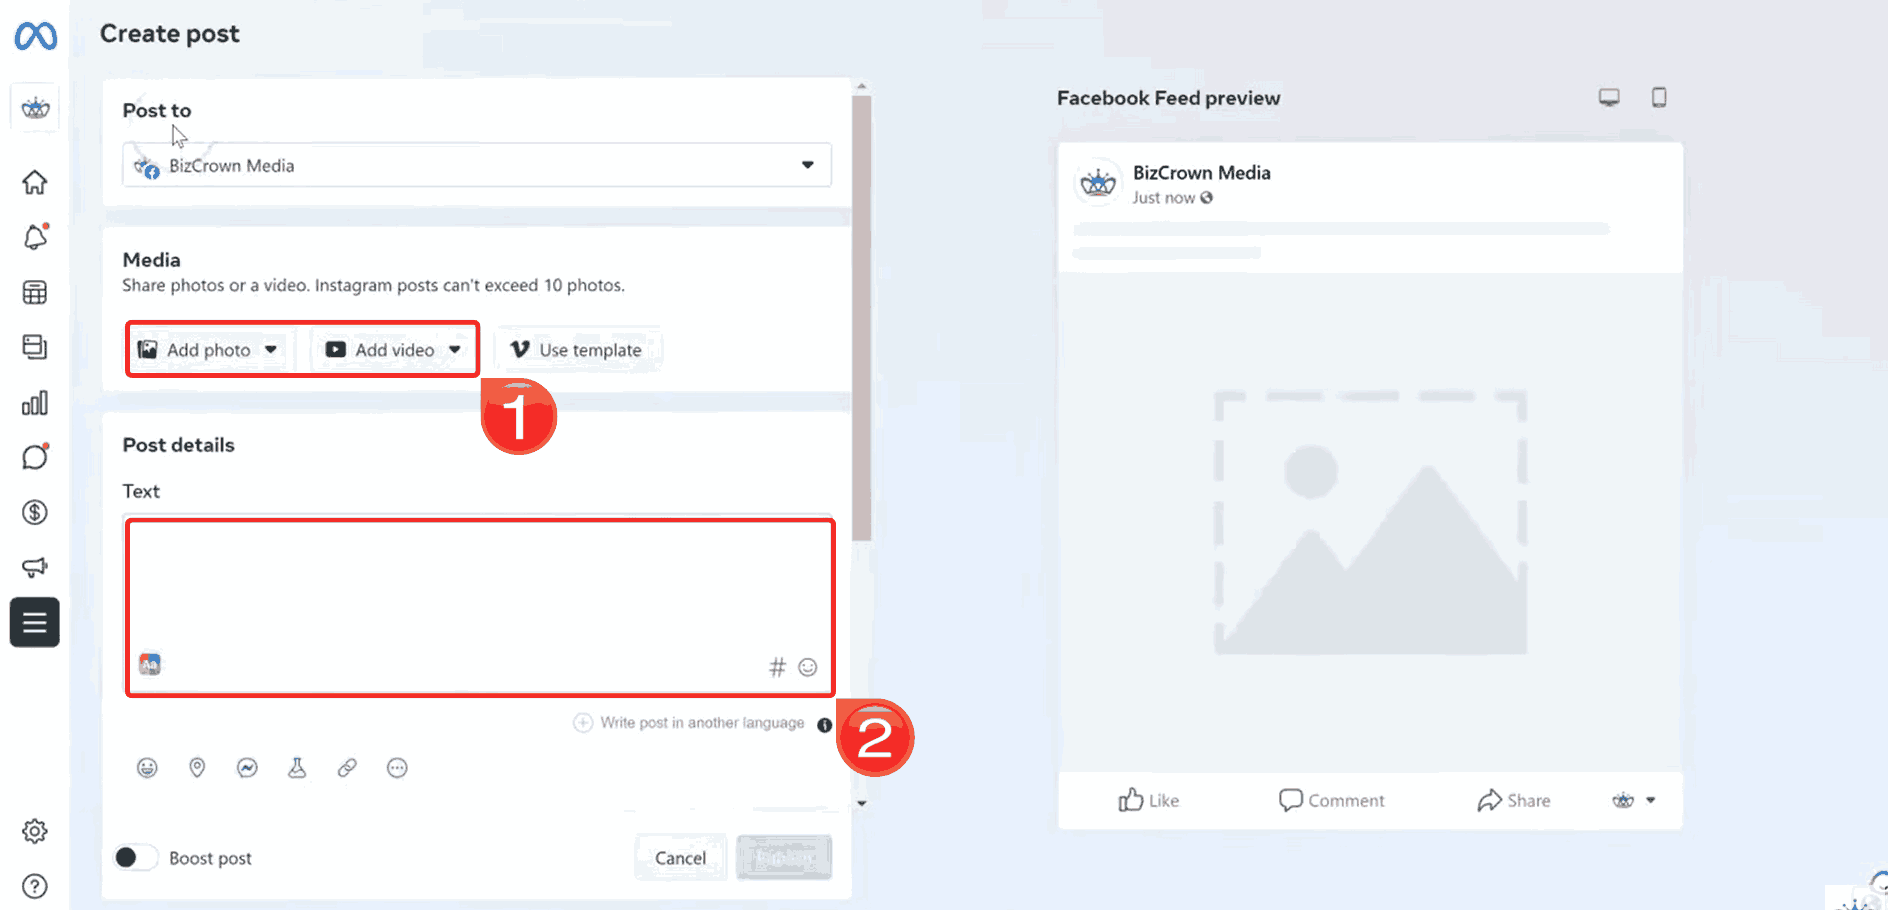
Step 4: Click on “Schedule”. This will open up the option to choose when your post should go live.
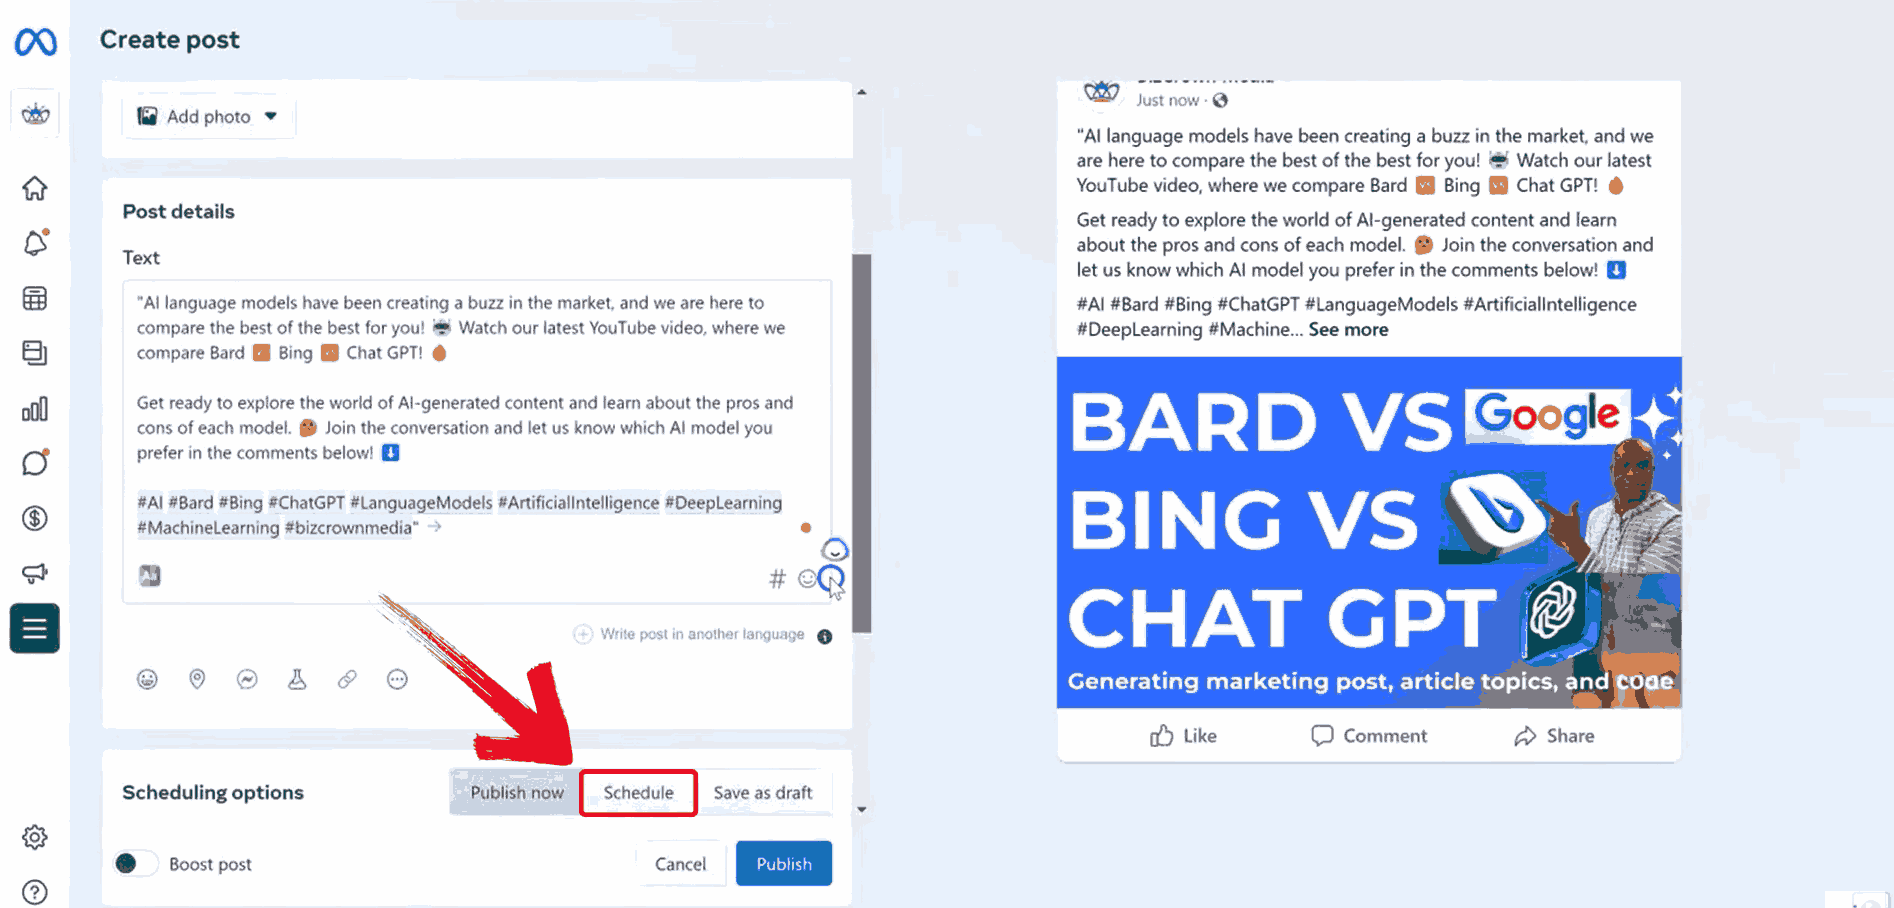
Step 5: Set your preferred date and time. This tells Instagram exactly when to publish your post.
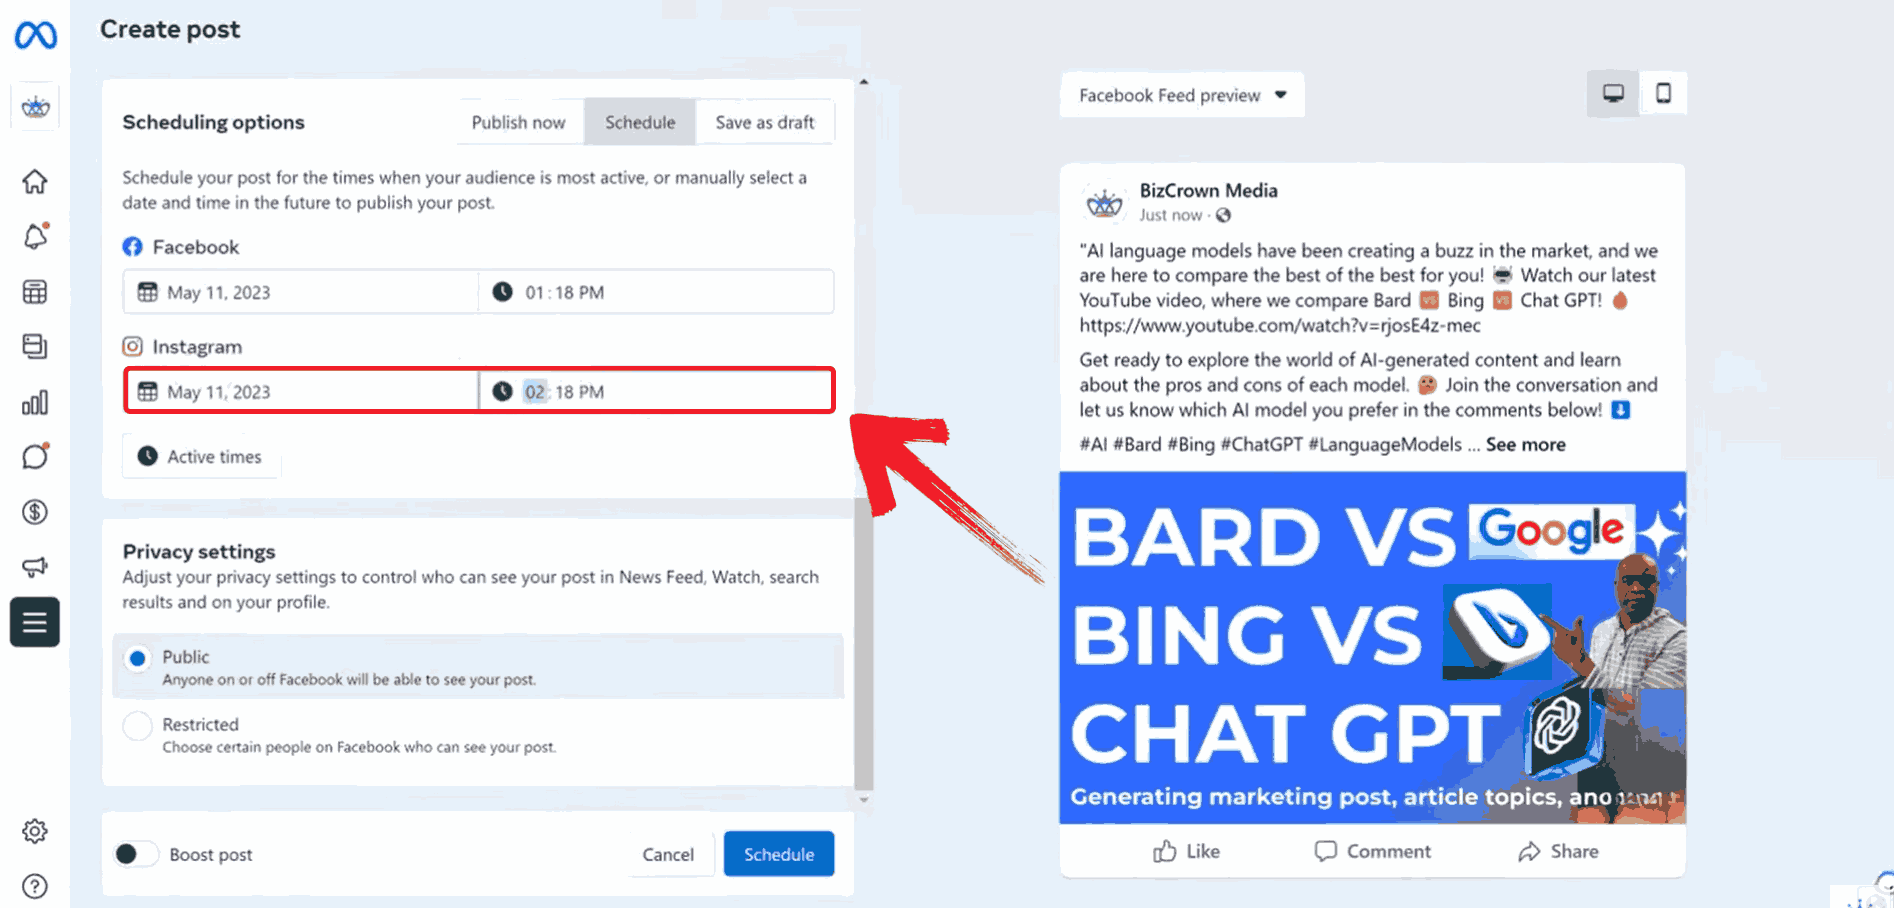
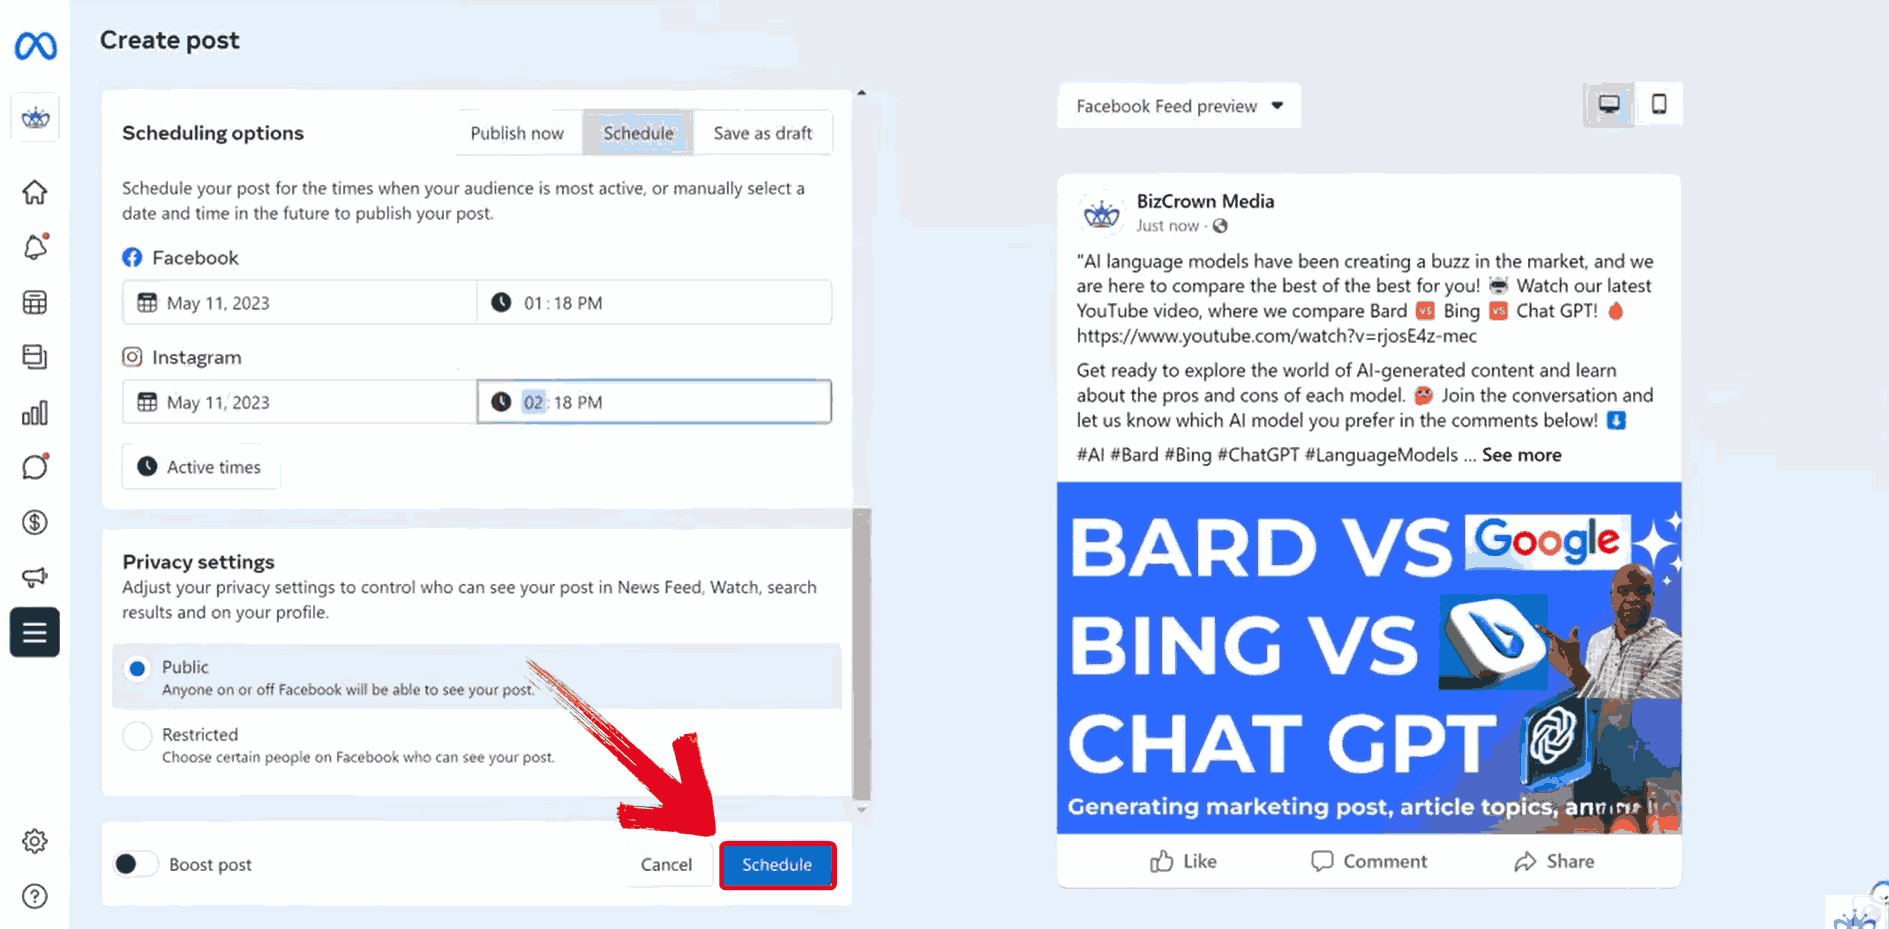
Step 6: Click on the blue Schedulebutton to finalize everything. Your post is now officially lined up and ready to go live at the time you chose.
How to Schedule Posts on Instagram Using Other Tools
Meta Business Suite is great, but it’s not the only option out there. Personally, I’ve explored a few third-party tools that make things even steadier, especially if you're managing multiple platforms or accounts. If you’ve ever pondered how to schedule a post on Instagram with more flexibility or creative support, these tools are worth checking out. Many of them offer features Meta doesn’t, like AI caption suggestions, hashtag generators, or collaborative workflows. They’ve helped me visualize my content plan better and maintain a consistent posting rhythm during busy weeks.
Planable
When I needed my team to review posts before they went live, I started using Planable, an Instagram post scheduler that makes collaboration seamless. What I love most is real-time teamwork; it’s like Google Docs but for social media. You can preview posts exactly how they’ll look on Instagram, leave comments, and get approvals all in one place. It’s been a blessing in disguise for content planning with others.
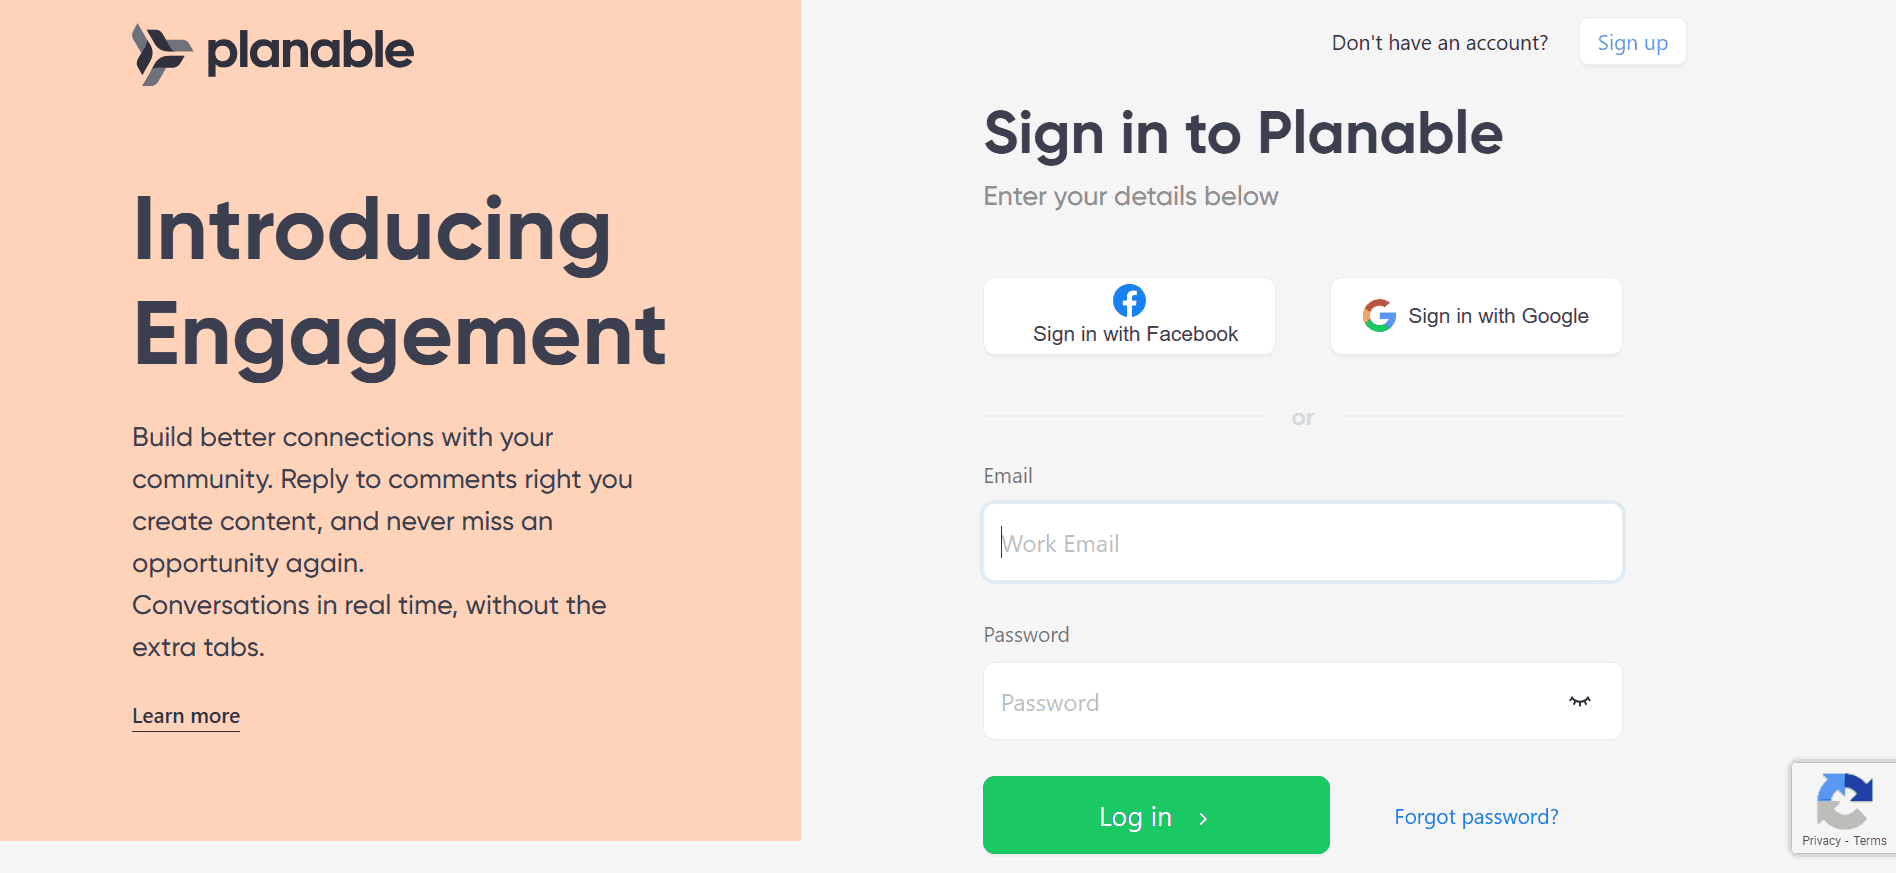
Step 1: Head over to Planable.io and log into your account. If you don’t have one yet, you can sign up for free.
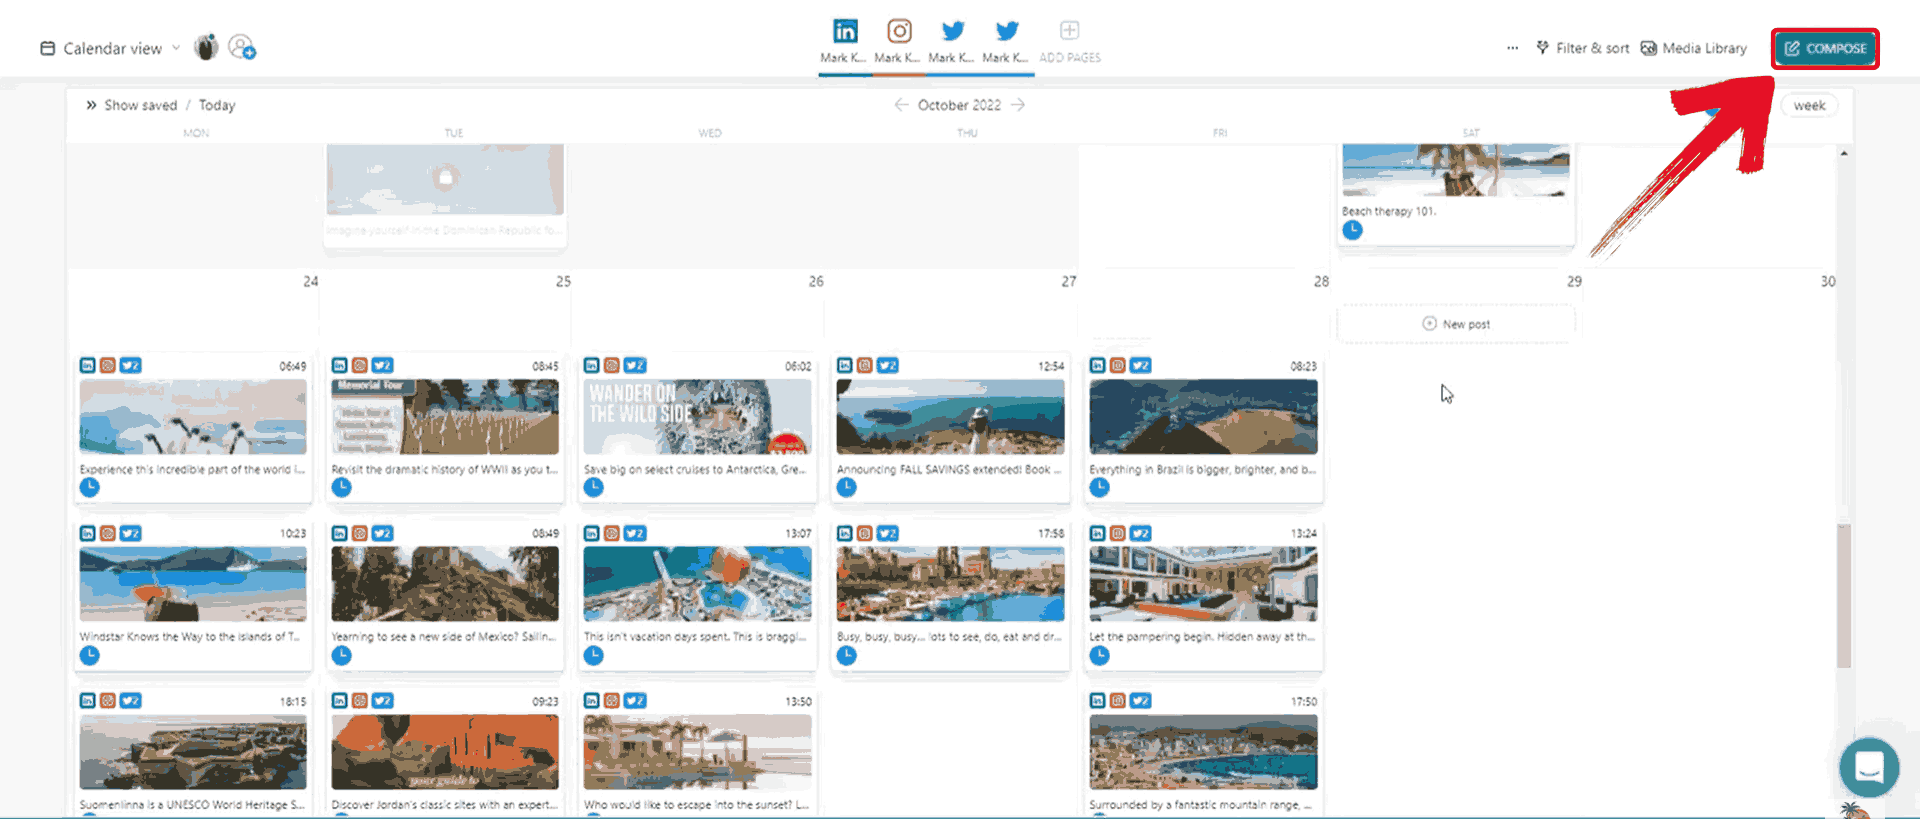
Step 2: Click on the green“Compose” button. A pop-up editor will appear where you can start drafting your content.
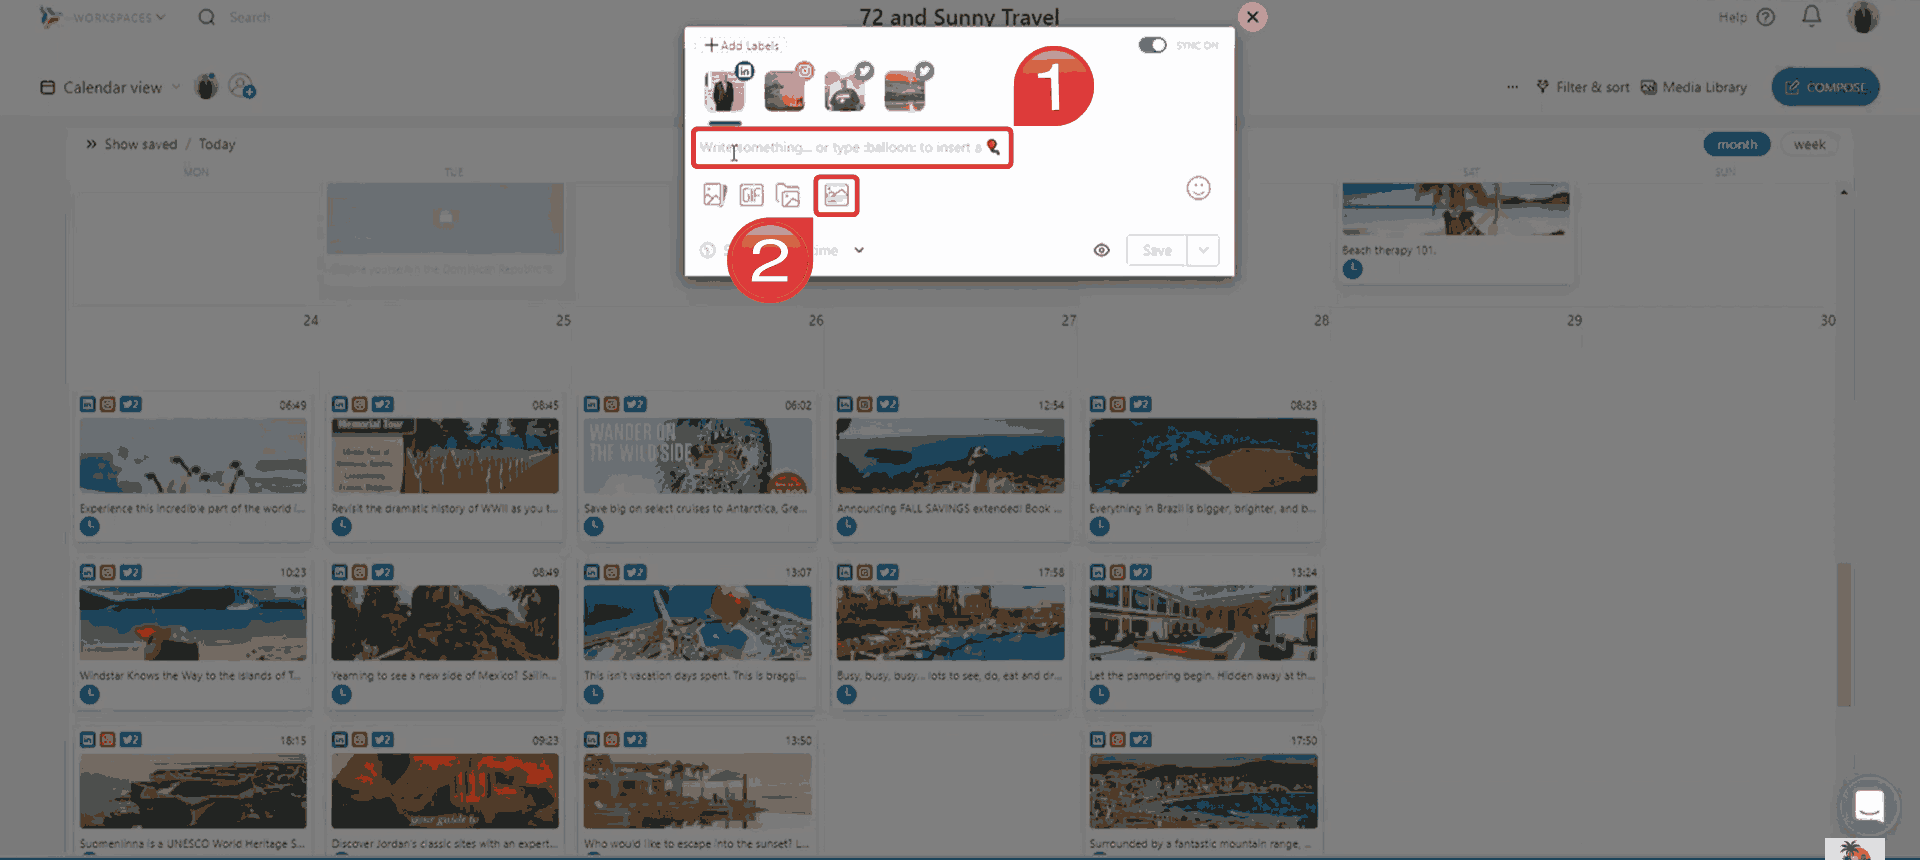
Step 3: Type your caption in the text field and add your image or video by clicking on the media icon.
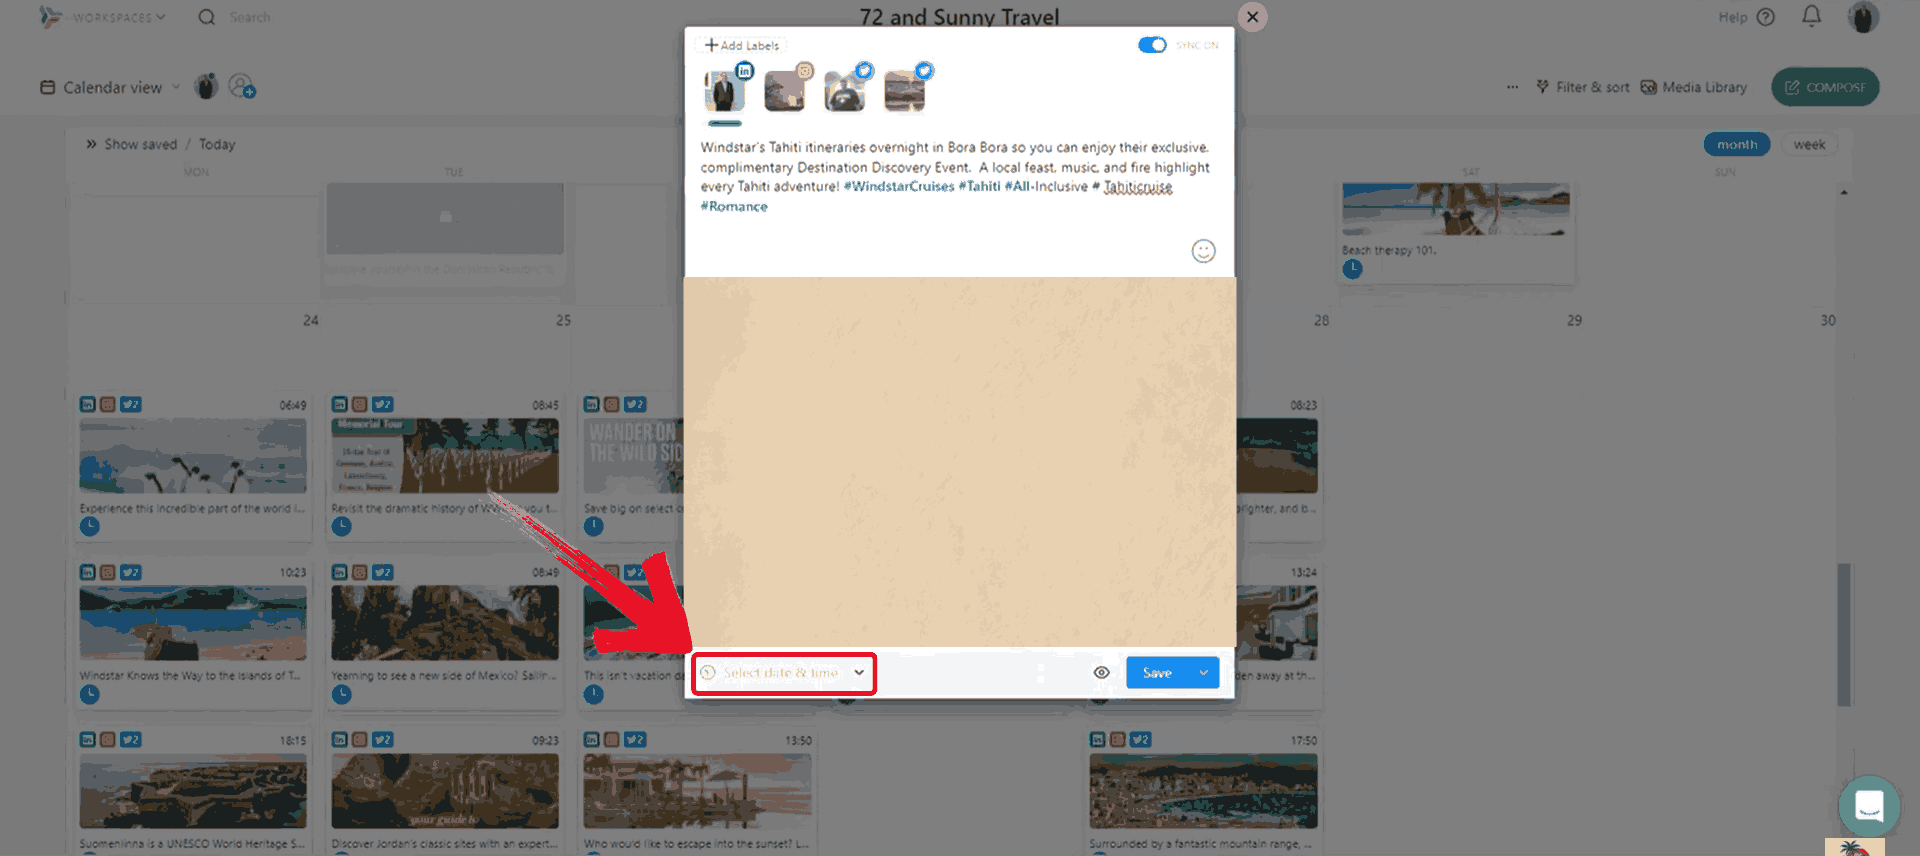
Step 4: Click on “Select Date & Time”. This will open up a calendar view where you can choose exactly when you want your post to go live.
Step 5: After setting the date and time on your calendar, click on “OK” to confirm your scheduling preferences.
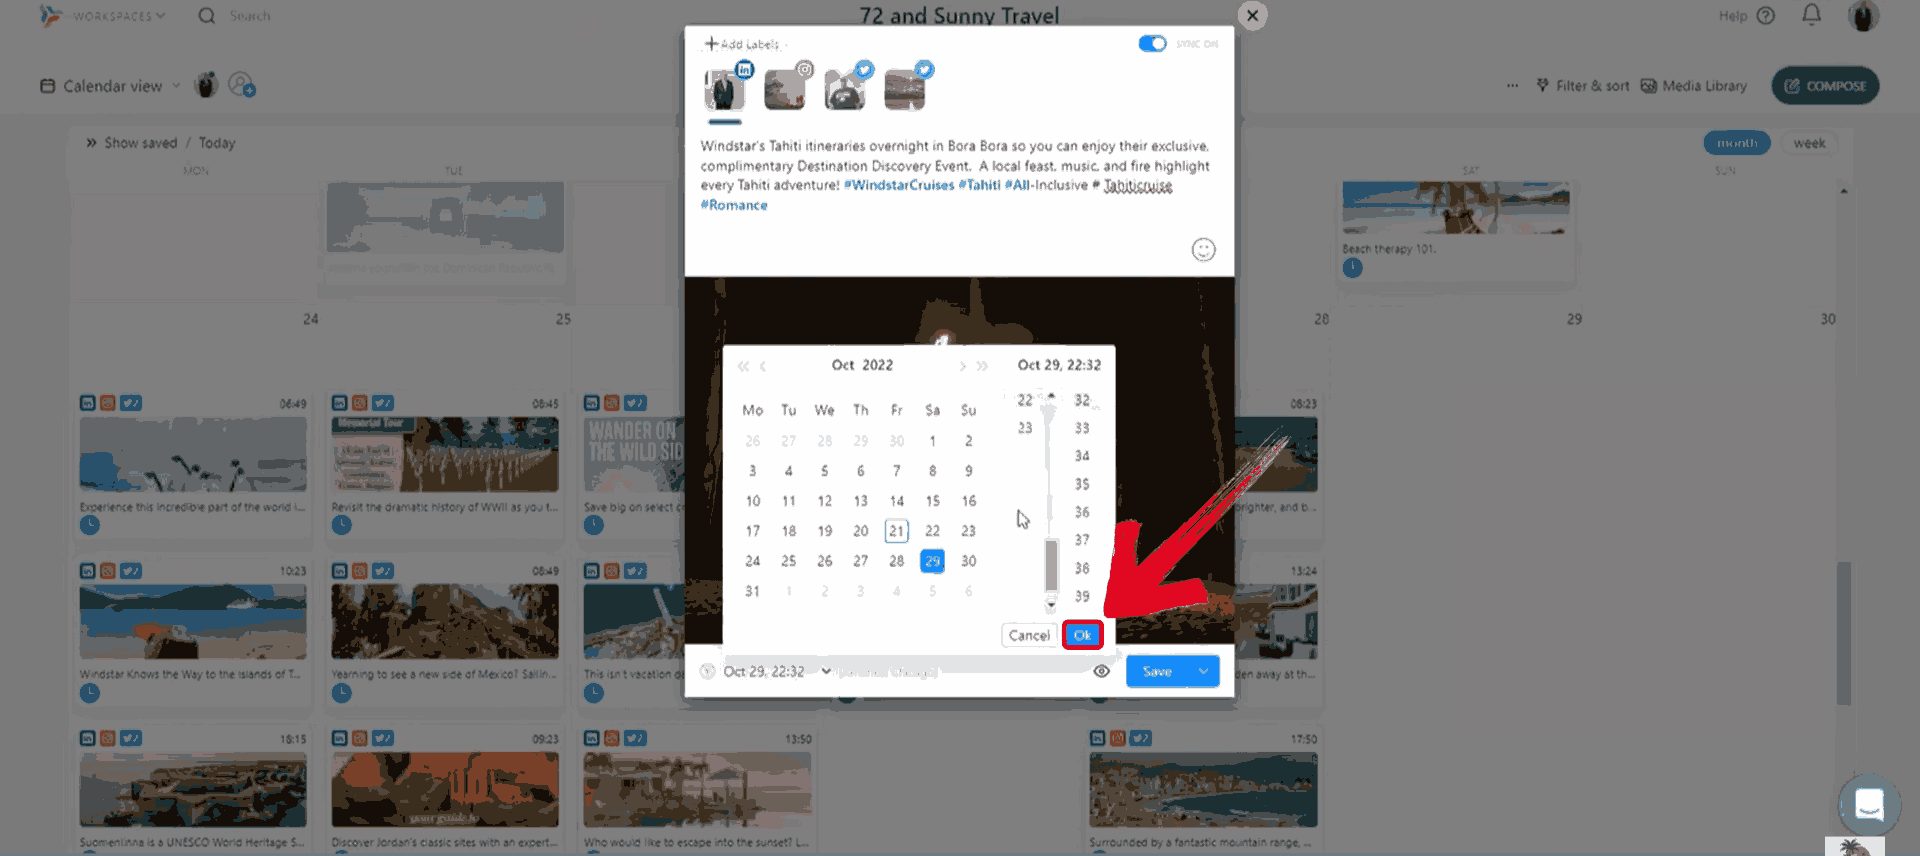
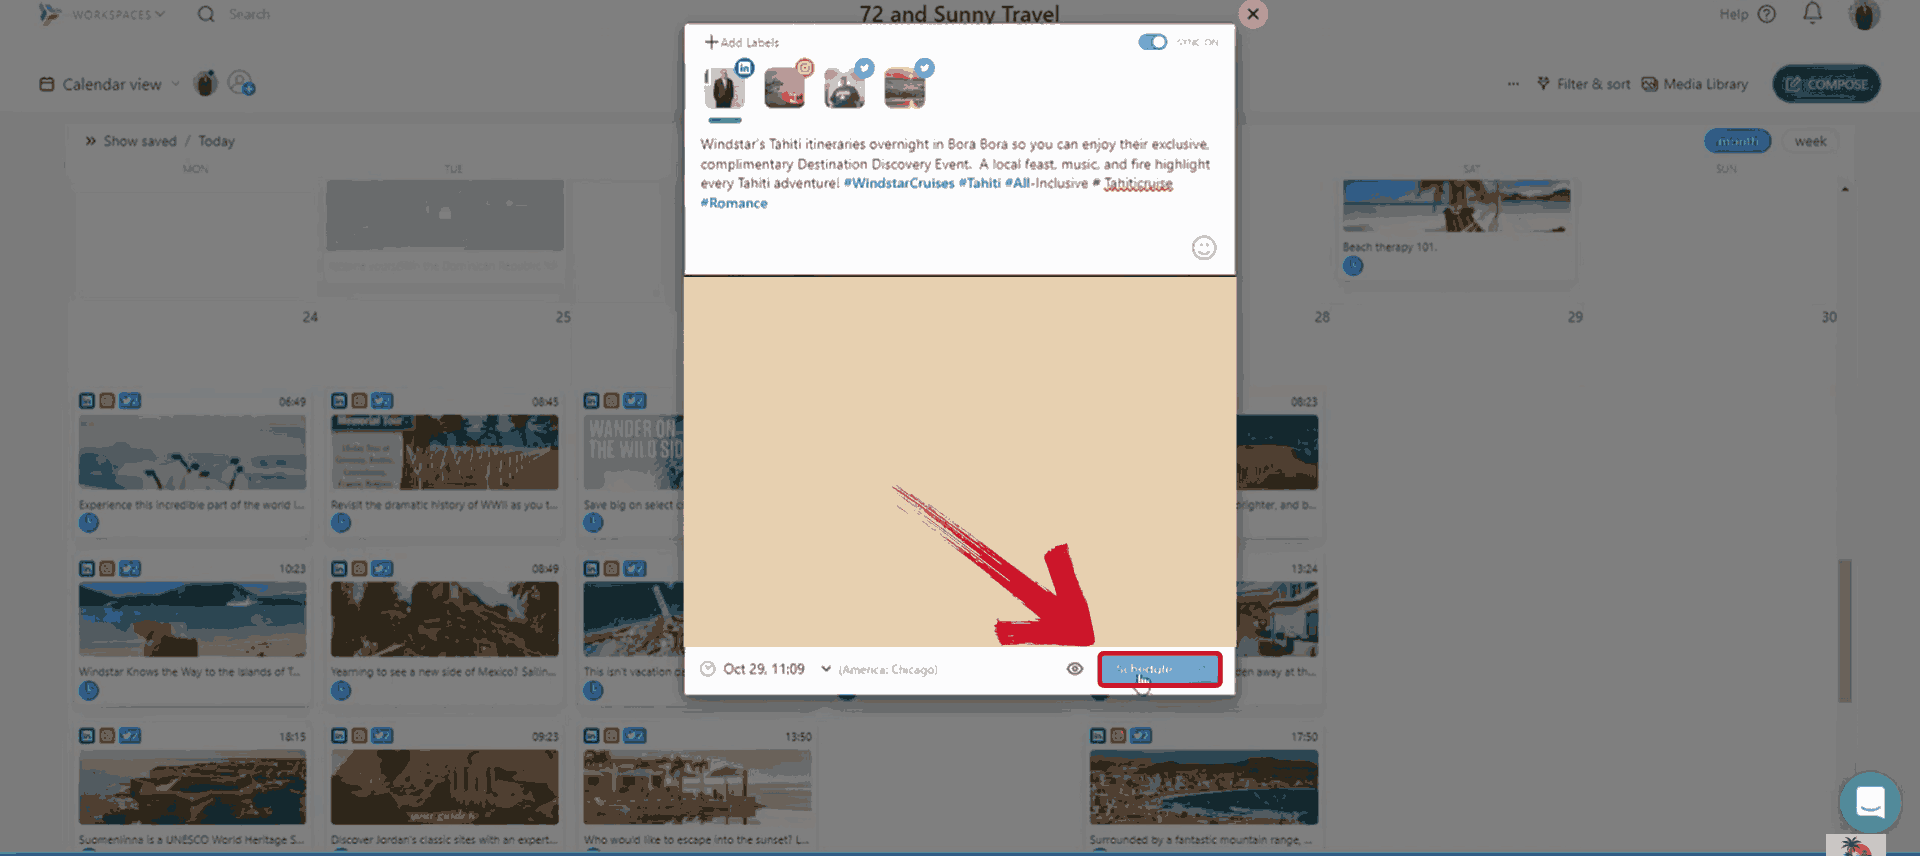
Step 6: Click on the blue“Schedule” button to lock it in. Your post is now ready to go live at the selected time.
Buffer
Buffer was the first tool I ever tried for scheduling, and it still holds up. It’s incredibly beginner-friendly and perfect when you want to just draft, queue, and move on. I like the fact that it lets me manage multiple accounts without any pop up ads. The analytics feature also gives me a quick idea of what’s working and what’s not.
Step 1: Start by going to Buffer’s website and log into your Buffer account to connect your Instagram profile if you haven’t already.
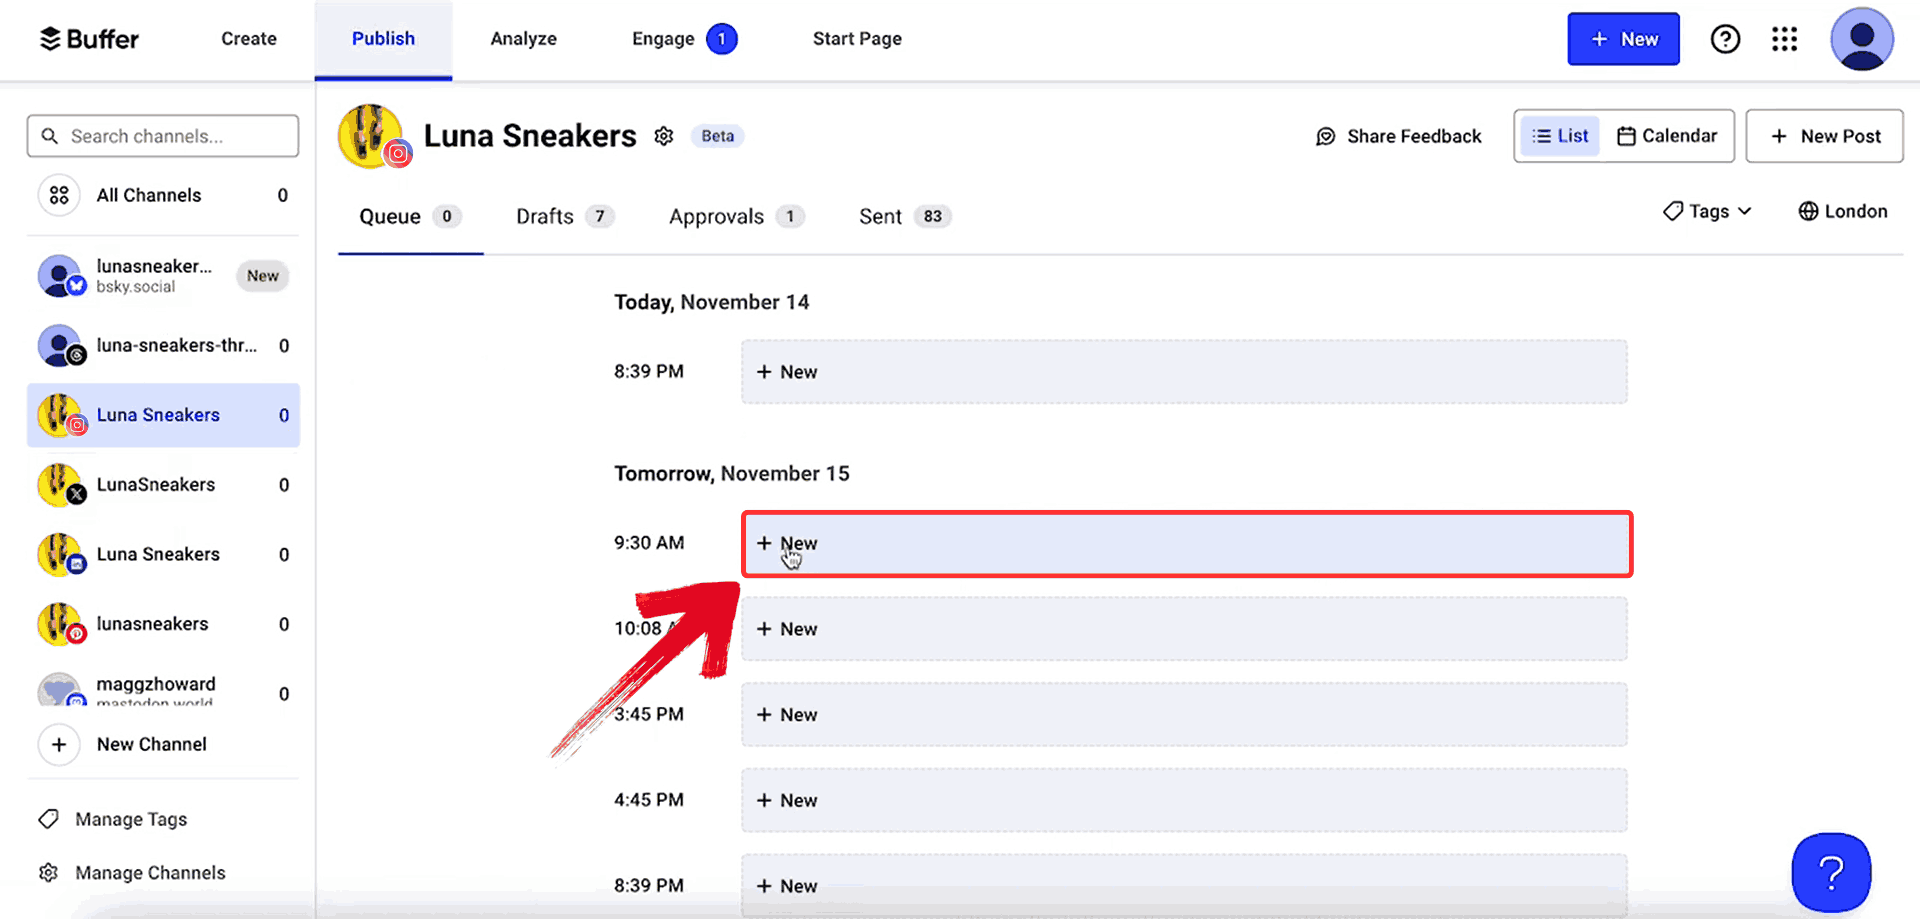
Step 2: From your dashboard, scroll to your desired time slot and click on the “+ New” button. This opens the post composer right in the calendar view for easy scheduling.
Step 3: In the composer window, add your caption in the text box and upload your image or video.
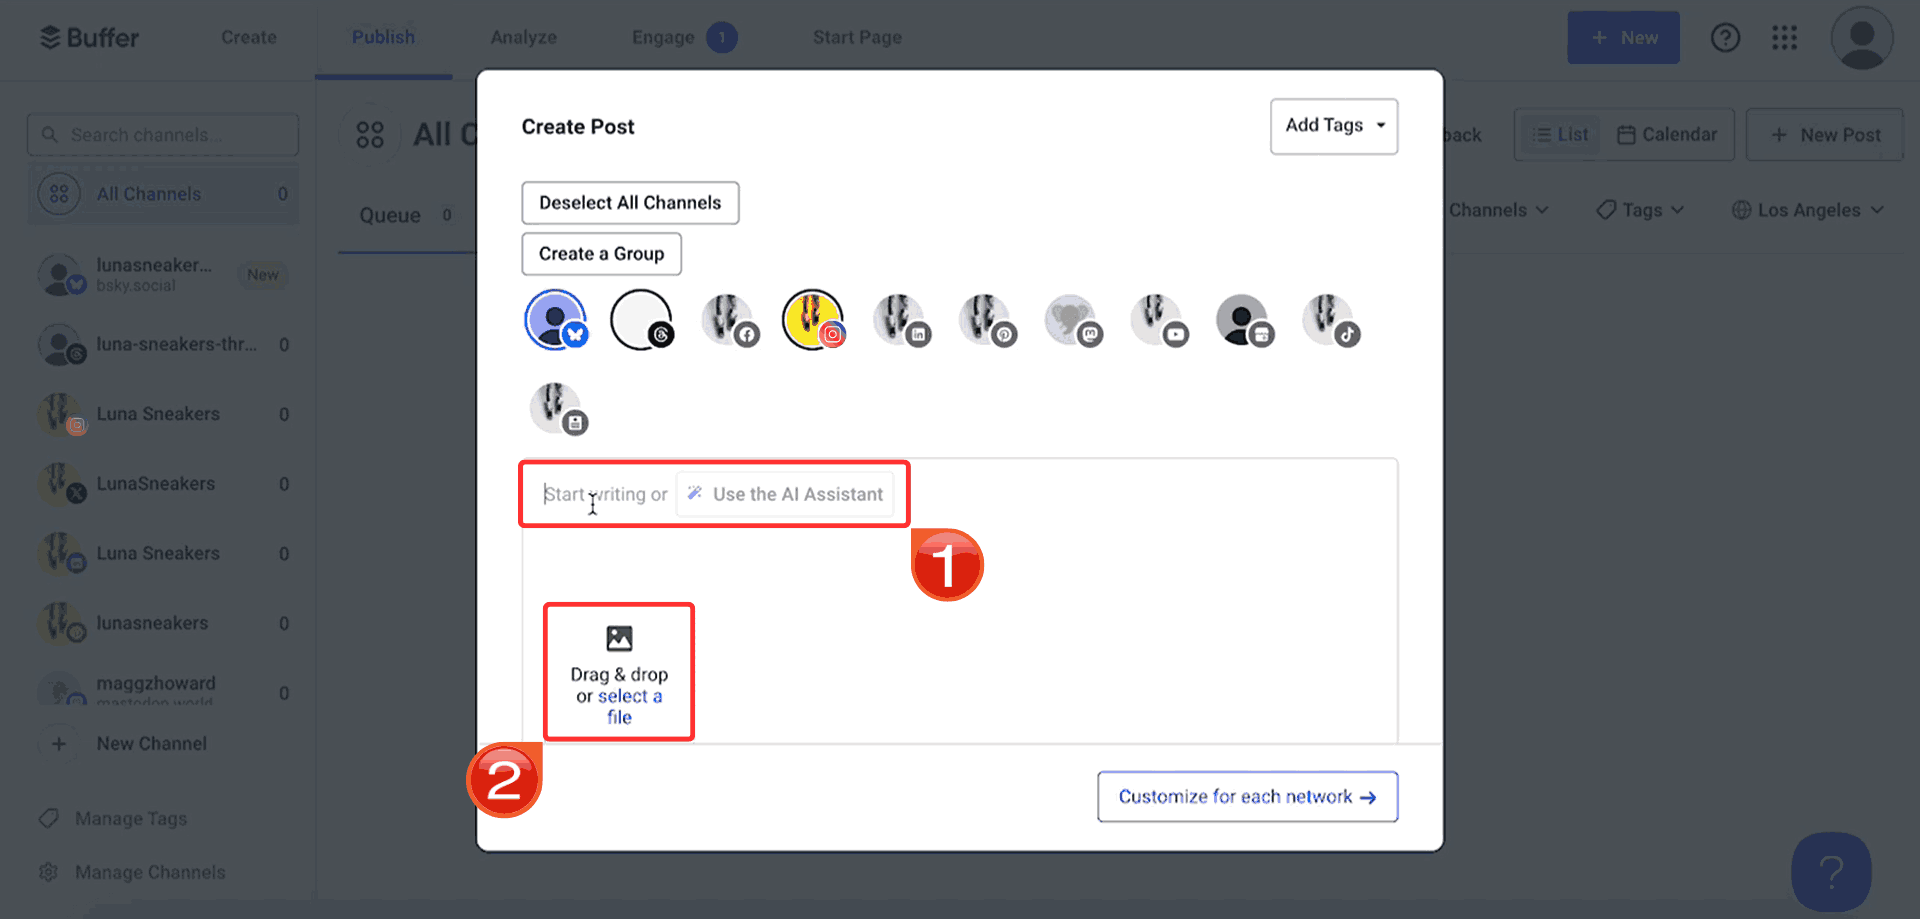
Step 4: Click on “Customize for each network” to move forward to finalizing the post.
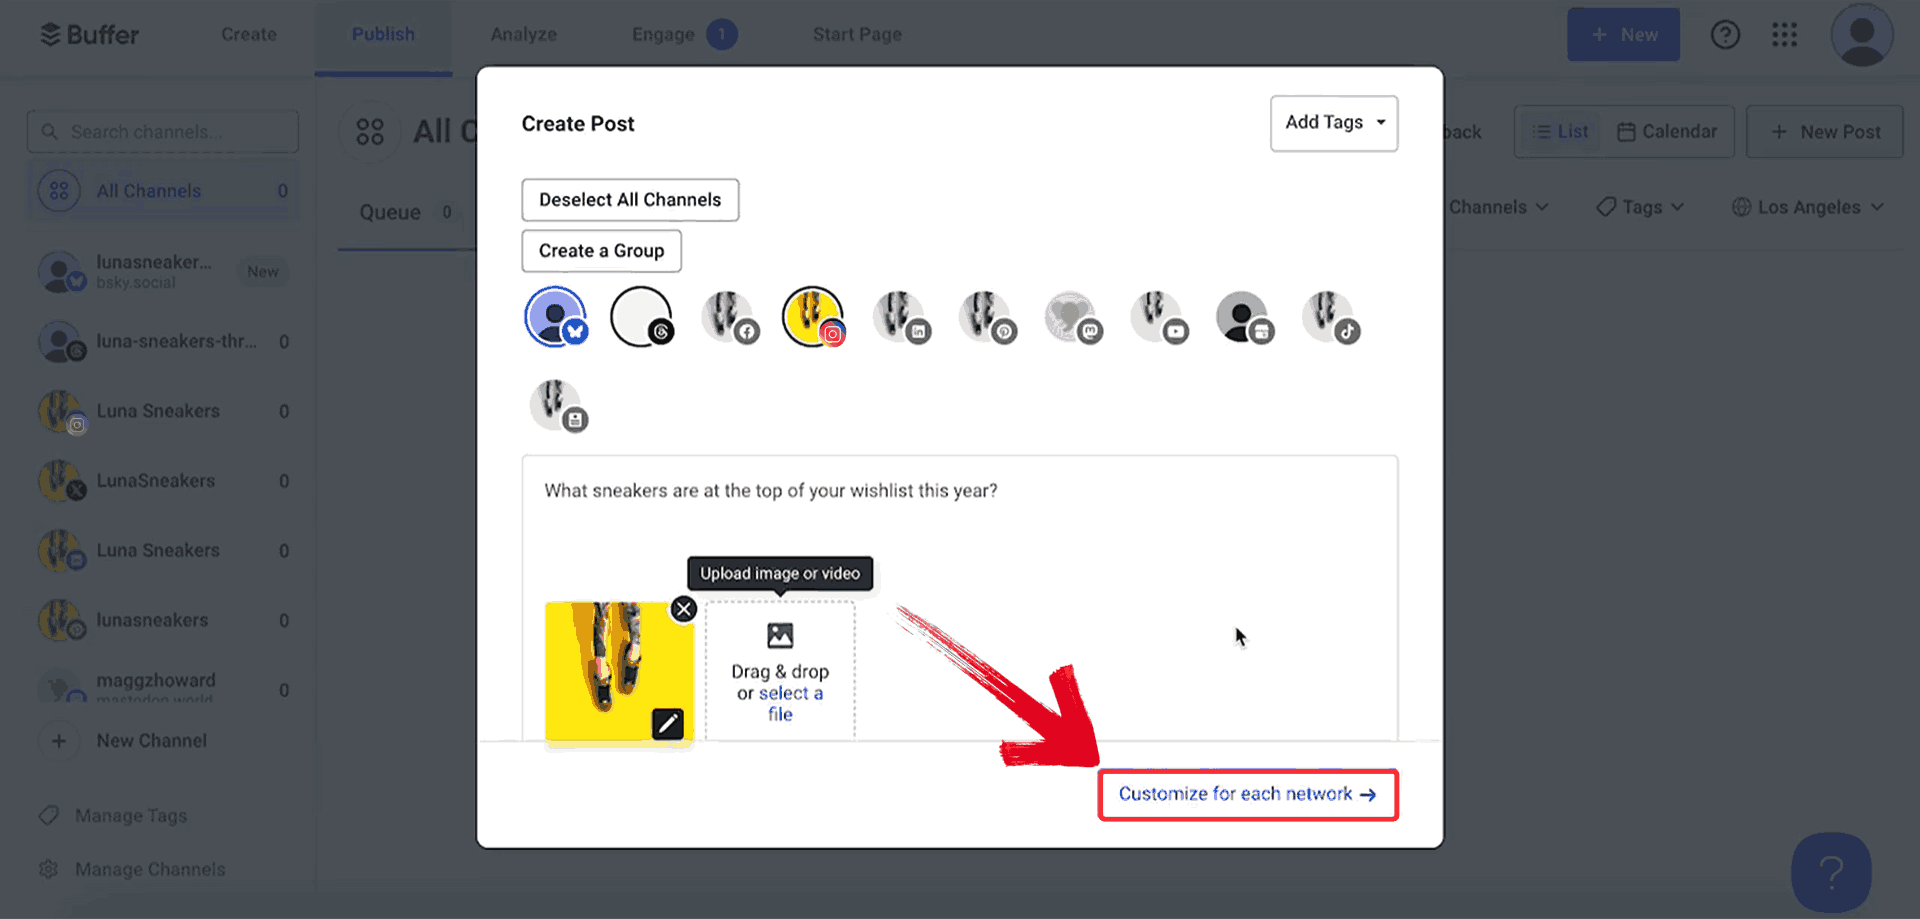
Step 5: Once everything looks good, click on“Add to Queue” to finalize the post.
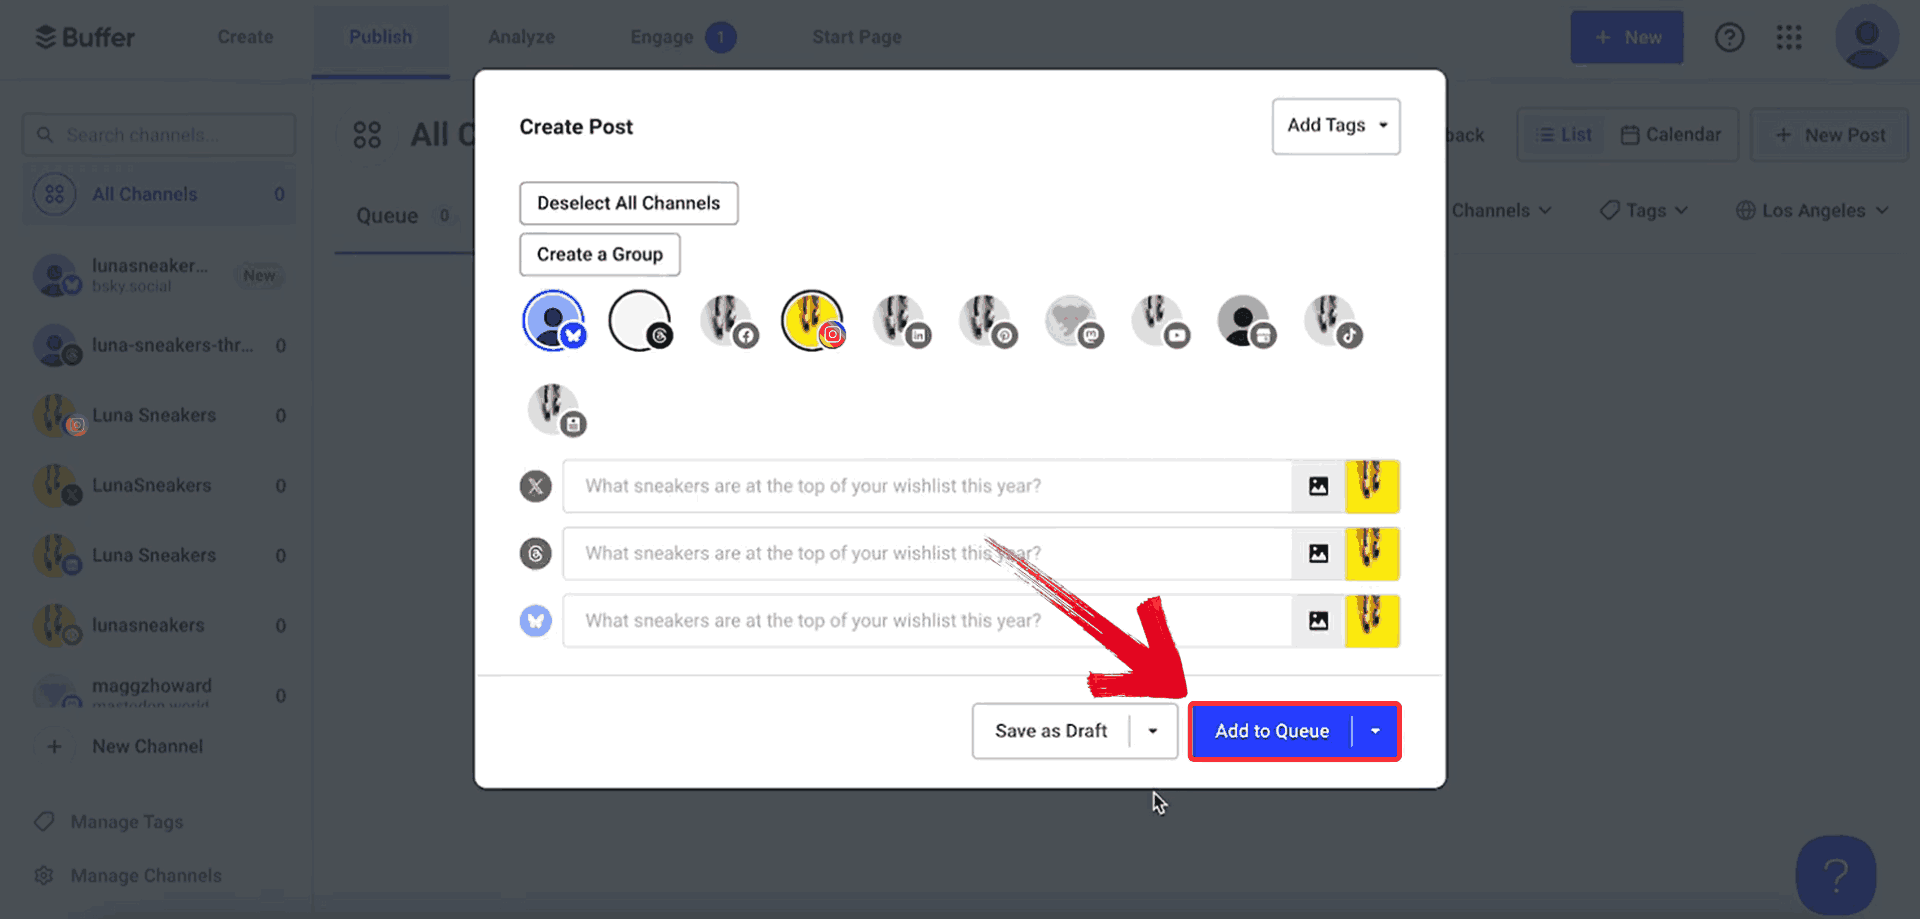
Note: Make sure your Instagram profile is selected before creating the post, especially if you’ve connected multiple social media accounts.
Post Planner
Post Planner focuses on engagement-first scheduling. One of the first questions I had when exploring tools was: can I schedule a post on Instagram and still keep it engaging? Post Planner answered that by not only handling scheduling, but also helping me discover top-performing posts in my niche. It gives content suggestions, optimizes timing, and recommends what to post and when based on engagement trends so I never run out of ideas, and planning feels far less stressful.
Step 1: Head to Postplanner and log in with your credentials. Once you're in, you'll land on your dashboard where all your connected accounts are visible.
Step 2: Write your caption in the text box and add an image or video using the media upload option.
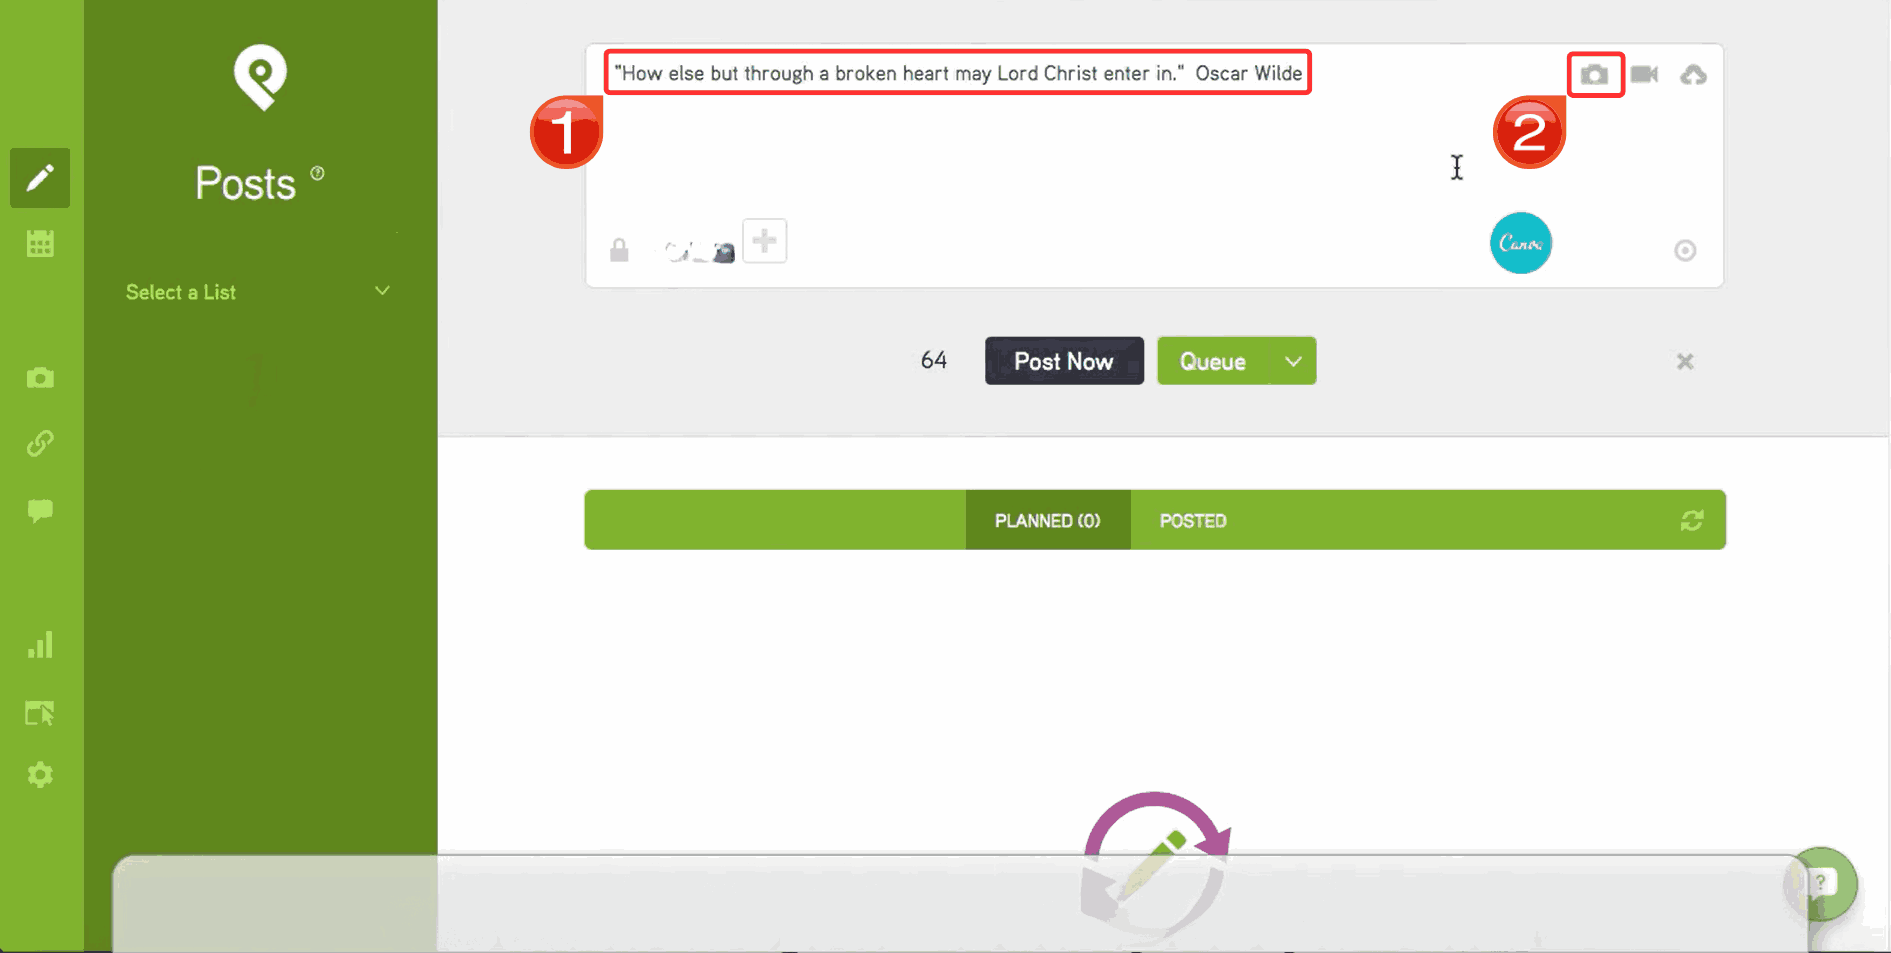
Step 3: Click the small dropdown arrow beside the green Queue button and select “Schedule Post” to begin setting your preferred time.
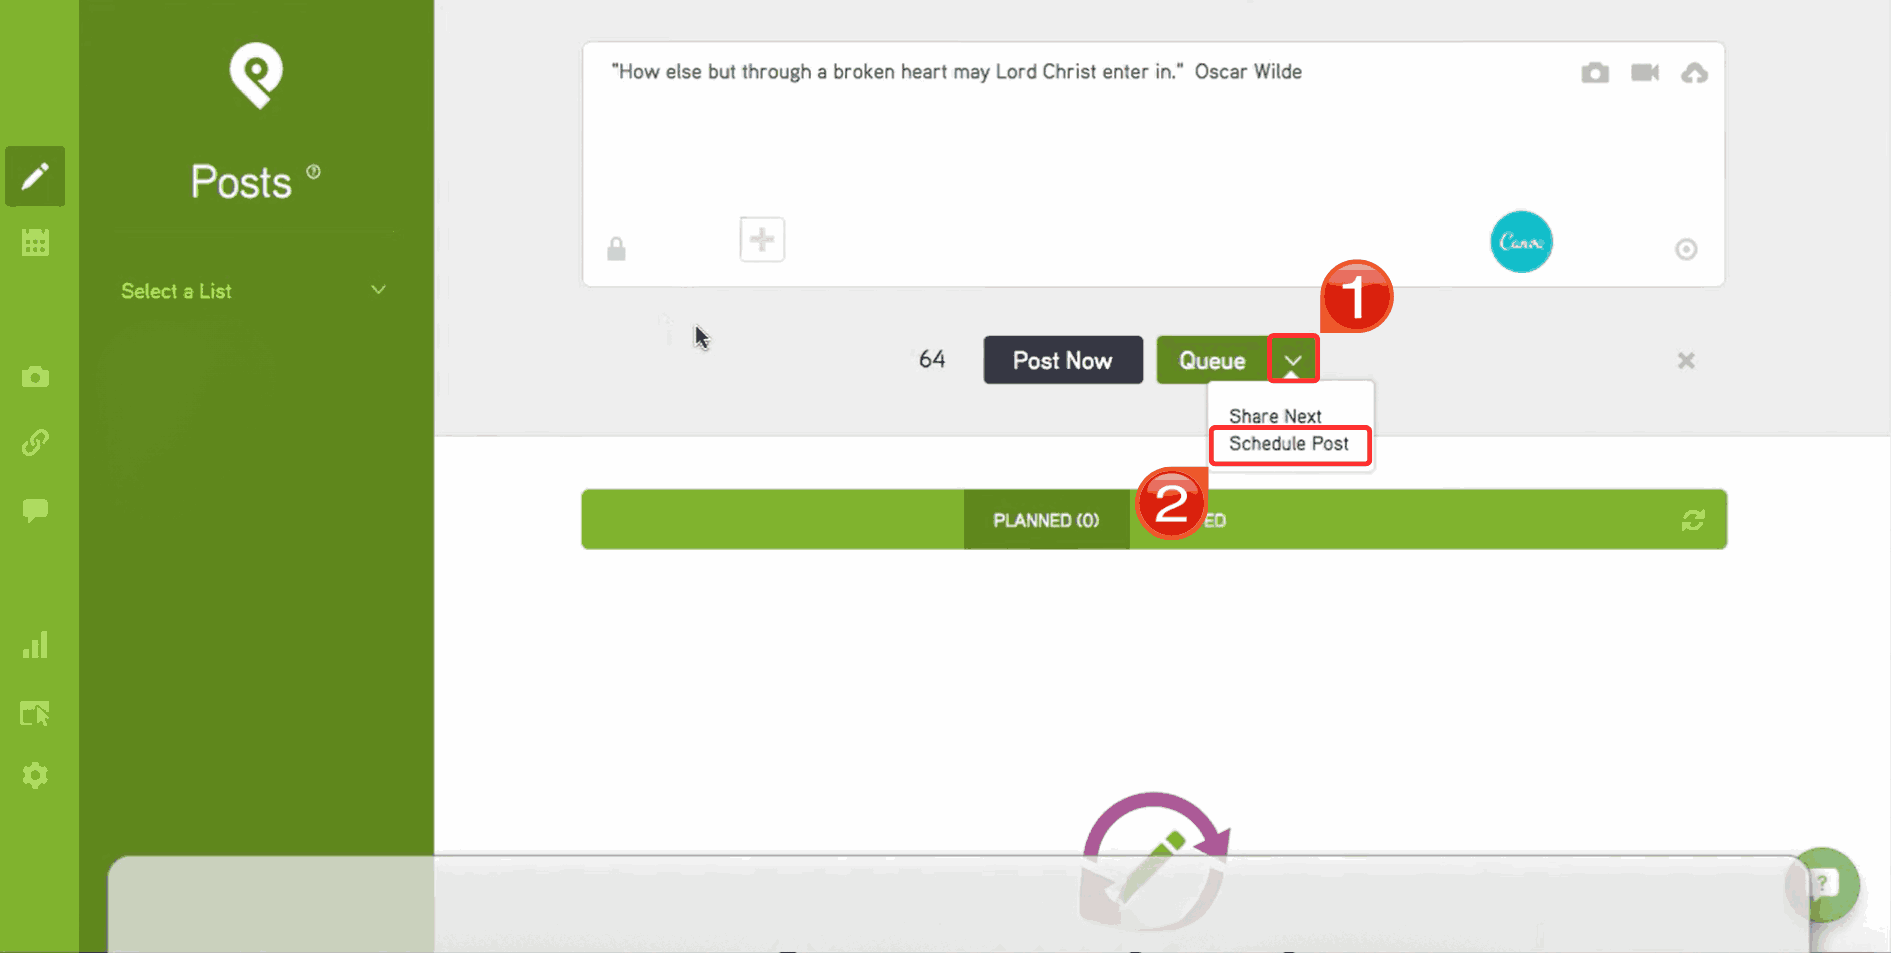
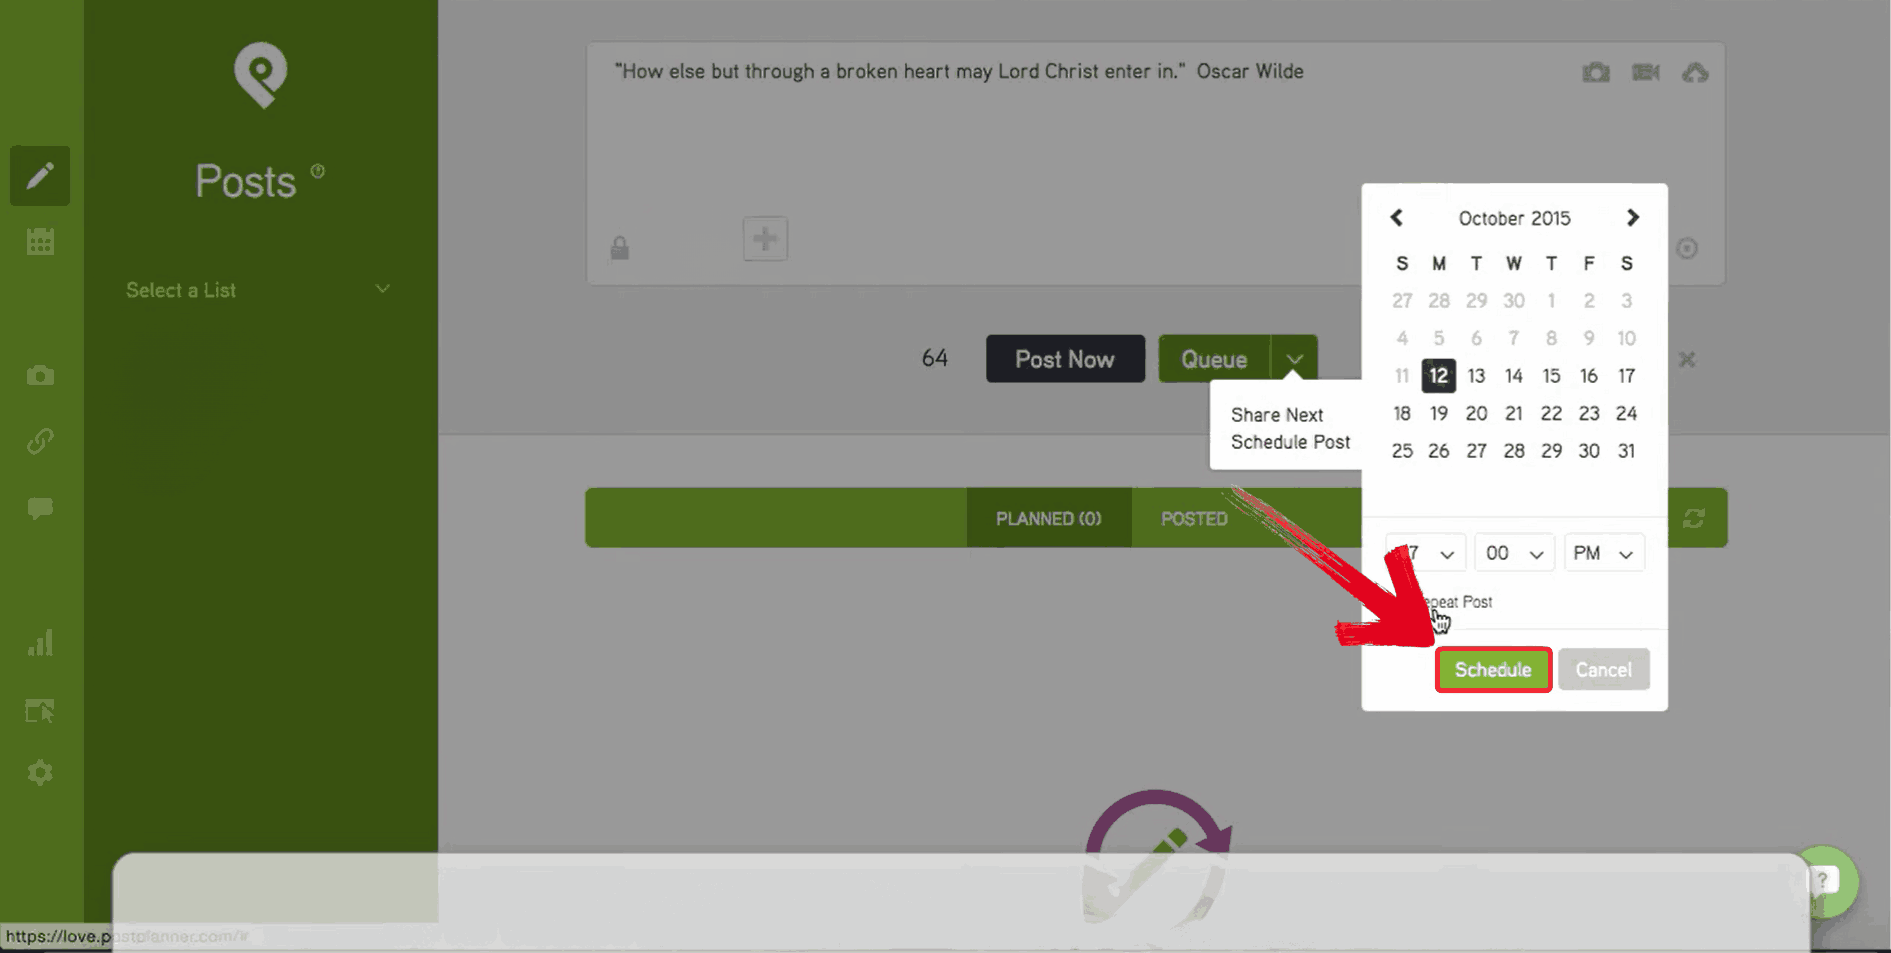
Step 4: Once you’ve chosen your desired date and time directly from the calendar interface, click the green“Schedule” button to finalize. Your post will now be queued and published at the set time automatically.
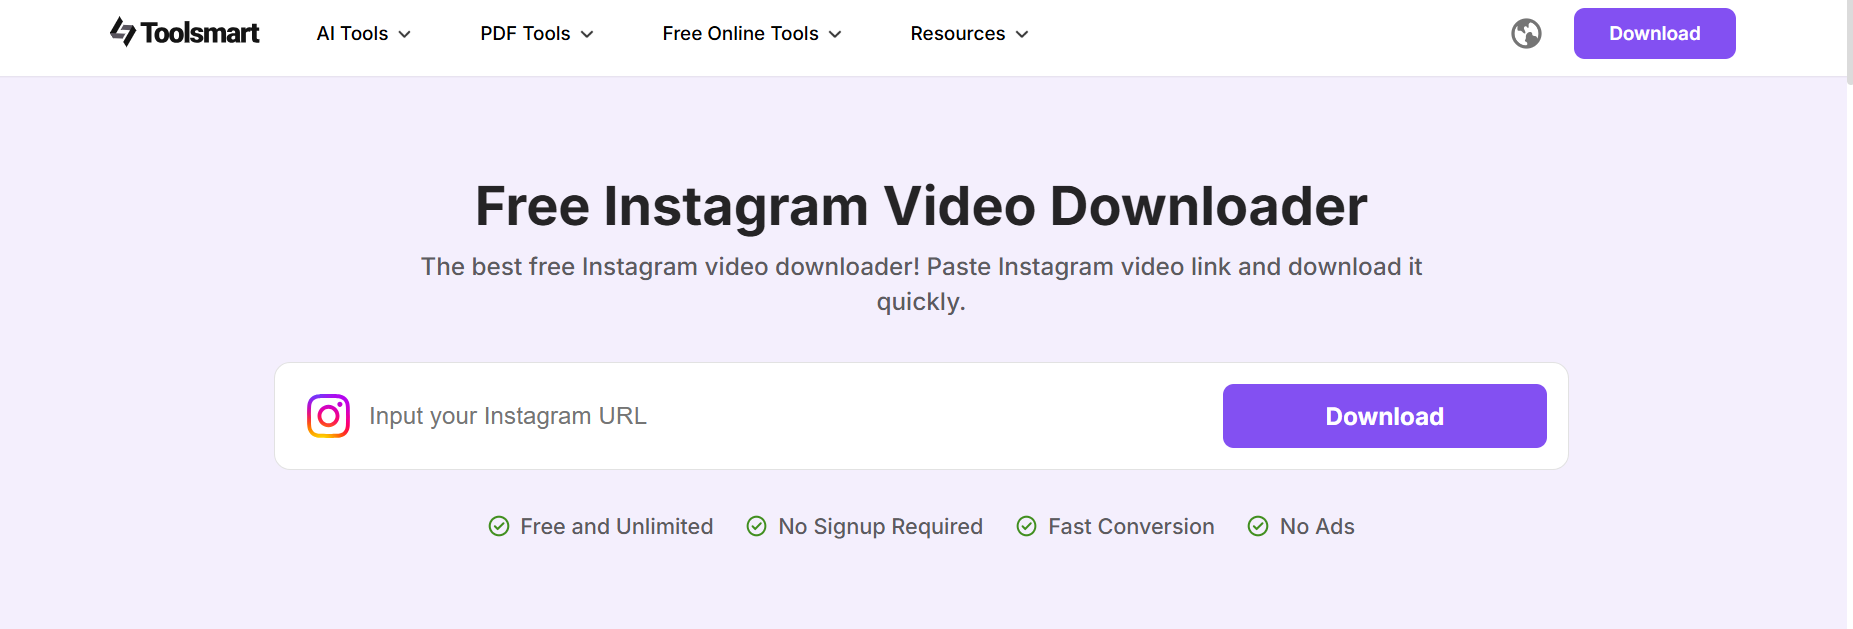
Best Supplement Tool to Schedule Instagram – Toolsmart’s Instagram Video Downloader
I stumbled upon Toolsmart’s Instagram Video Downloader when my younger brother used it to quickly download an Instagram reel we’d posted months ago. We were trying to reshare a reel for a breast cancer awareness campaign, and instead of going through our old drive folders or searching for the original file on Canva, he just used Toolsmart to grab the video directly. What took me by surprise was how fast and steady the download was as there were no watermarks or drop in quality. Even better, we could reupload the video straight into our scheduling tool without needing to re-edit anything.
While Toolsmart is mainly known for its downloading features, it’s quite helpful when you want to save time and repurpose content. Here’s a quick breakdown of what it offers and where it shines or falls a little short.
Features:
Toolsmart allows you to download Instagram videos, reels, and posts in high resolution without any noticeable drop in quality.
You don’t need to log in or create an account to use the tool, which makes the process much faster.
The tool works through a simple copy-and-paste mechanism: paste the link, and you're good to go.
It’s compatible with both desktop and mobile devices, so you can download content on the go.
The downloaded videos come without any watermarks, making them clean and ready to use for reposting or archiving.
Pros:
Works on PC and mobile
Doesn’t compress your video quality
User-friendly for beginners
Cons:
Doesn’t support private accounts
No batch downloading feature yet
How to Use Instagram Video Downloader of Toolsmart?
There have been numerous occasions when I’ve spotted a reel that fits perfectly with the kind of content I want to post, mostly when I’m planning carousels or stories that tie into trending visuals. Instead ofscreen recording (which almost always messes with the quality), I use the Instagram Video Downloader from Toolsmart to quickly grab exactly what I need. I’ve used it to save past content from campaigns, testimonials, and even audio reels I want to remix later. Here’s how it works:
Step 1: Copy the URL of the Instagram Reel you want to download then paste it into Toolsmart’s Instagram Video Downloader.
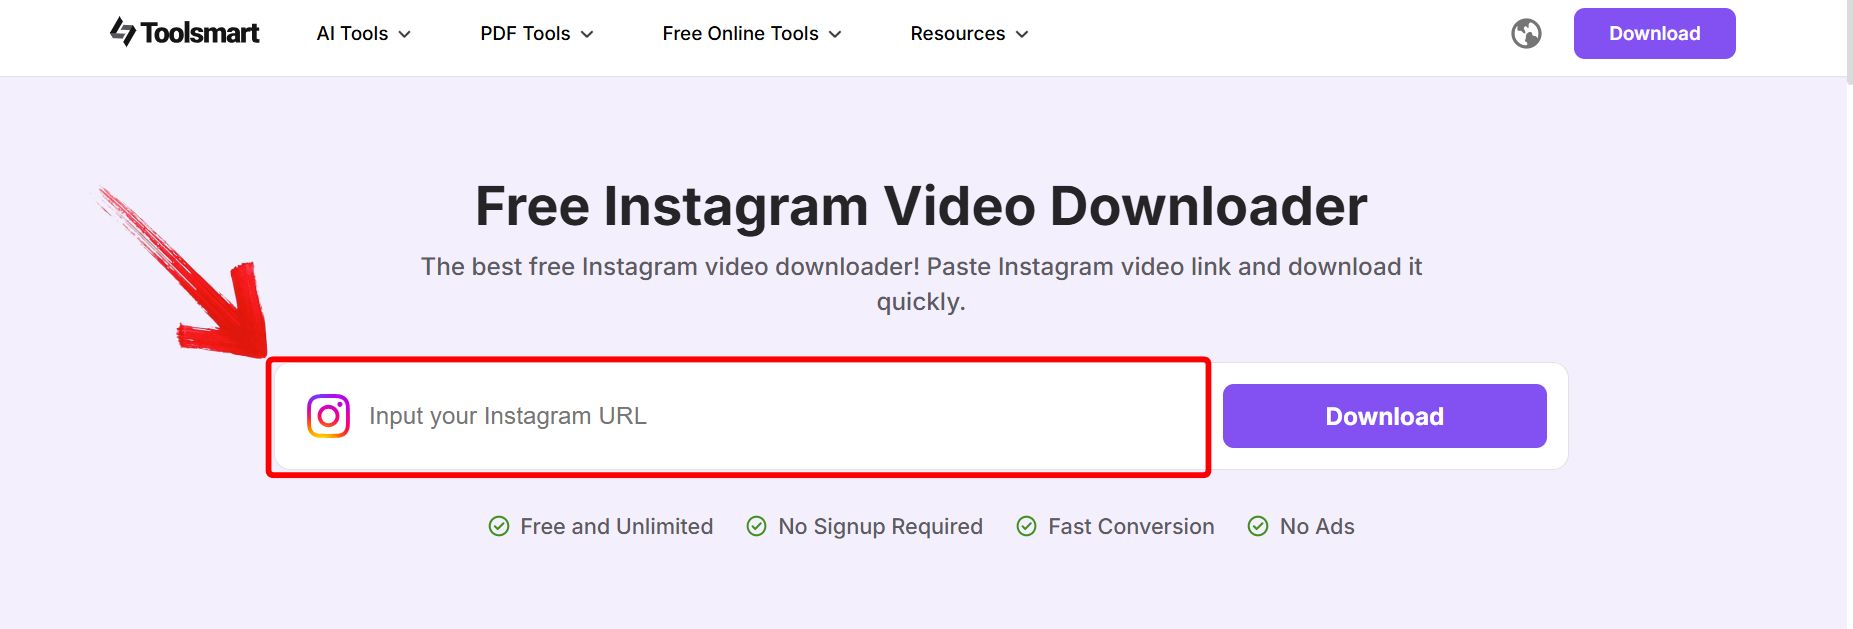
Step 2: Paste the link into the download field and click “Download”.

FAQs
1. Why can’t I schedule posts on Instagram?
If you’re using a personal account, you won’t have scheduling options. Switch to a Business account under settings > account > switch to professional.
2. Does Instagram have a calendar feature?
Not natively. But Meta Business Suite and tools like Sprout Social offer built-in content calendars.
3. Is there a limit to how many Instagram videos I can download?
No official limit. Just avoid spammy behavior to maintain access.
4. Can I download Twitter videos using Toolsmart’s Instagram downloader?
No, but Toolsmart offers a Twitter Video Downloader as well.
Scheduling Smarter, Not Harder with Toolsmart
You came here questioning how to schedule posts on Instagram, and I hope you’re leaving with more than just answers: you’ve got a toolkit. From Meta Business Suite to third-party platforms like Planable and Buffer, I tried different methods to see which ones delivered smooth, flexible scheduling across devices. But the part that really made things easier was using Toolsmart’s Instagram Video Downloader. I used it to download high-quality Instagram videos I’d created earlier, polish the footage, and prepare them for future posts, all without logging in or installing anything. While it’s not a scheduler itself, Toolsmart became the perfect support tool: helping me refine content before uploading, repurpose Reels with better timing, and save hours in the editing process.

