Adding realistic shadows is one of the simplest ways to transform a flat image into something polished and professional. However, for many beginners, Photoshop’s extensive tools can feel overwhelming. Even experienced users sometimes struggle with choosing the right shadow type, matching light direction, or achieving a natural fade.
So the real question is: how can you easily add realistic shadows in Photoshop, and is there a faster method to refine the final result? This guide breaks it down step by step.
Part 1: Step-by-Step Guide to Adding Shadows in Photoshop
Learning how to add shadow in Photoshop gives you full control over depth, contrast, and realism. Below are three practical methods, each suited for different types of images. These steps work for product photos, digital art, text effects, and even complex scenes where you need to know how to create a shadow in Photoshop accurately.
Method 1: Drop Shadow for Text or Objects (how to add shadow in Photoshop text)
This is the quickest way to apply a soft, professional-looking shadow. It works well for text, icons, product cutouts, and UI elements.
Step 1: Open your image
Open Photoshop and load the file you want to edit.
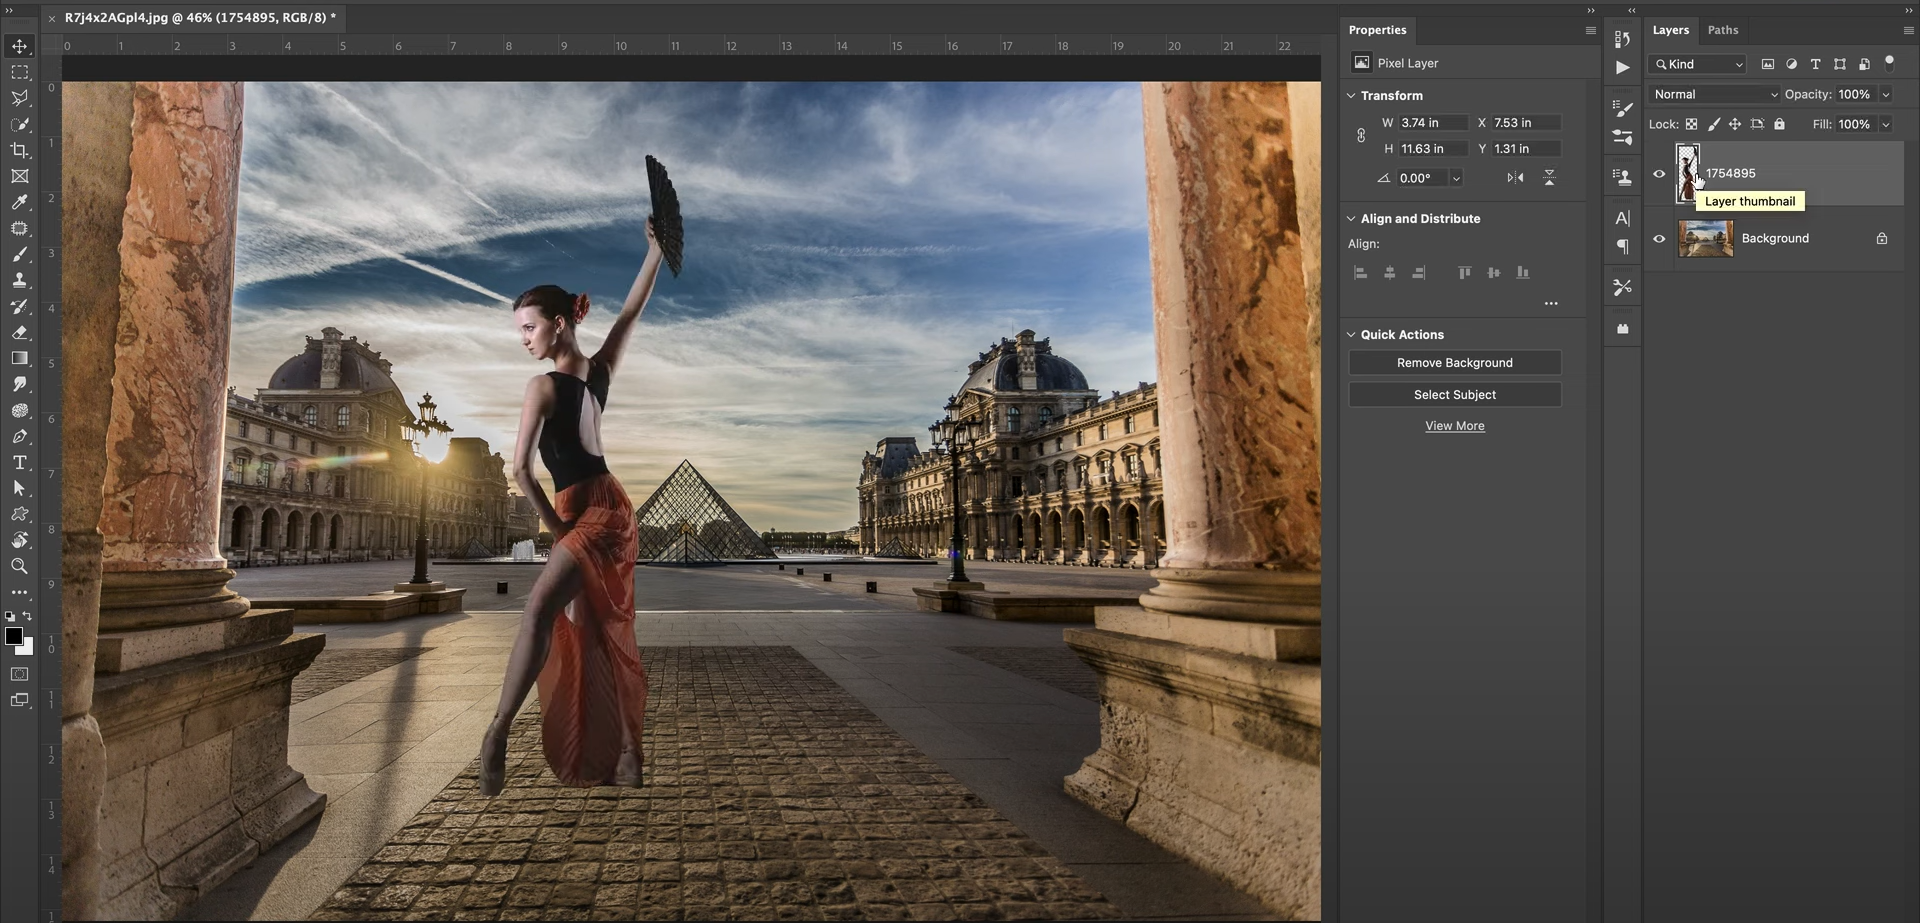
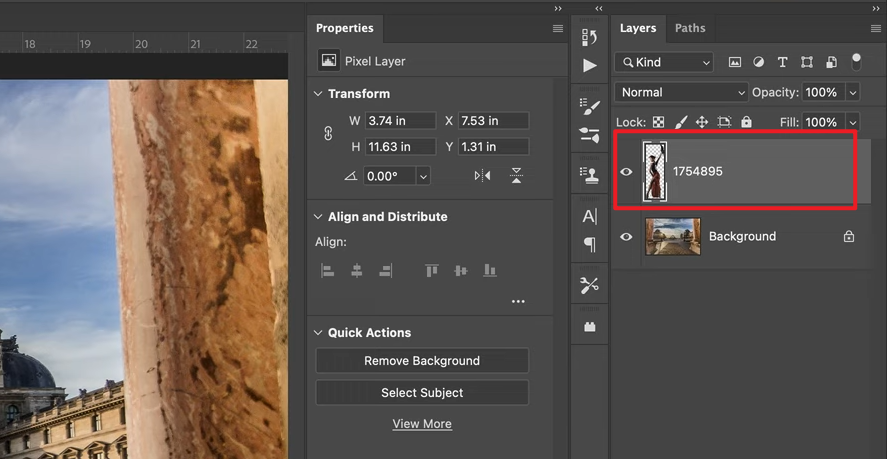
Step 2: Select the target layer
Click on the text or object layer you want to apply the shadow to.
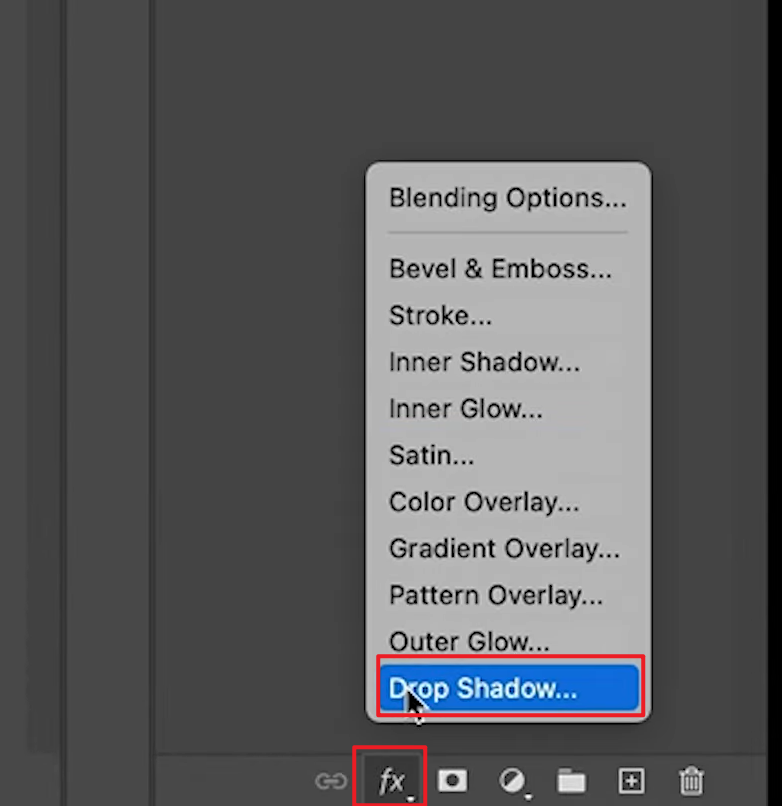
Step 3: Add Drop Shadow
Go to Layer > Layer Style > Drop Shadow.
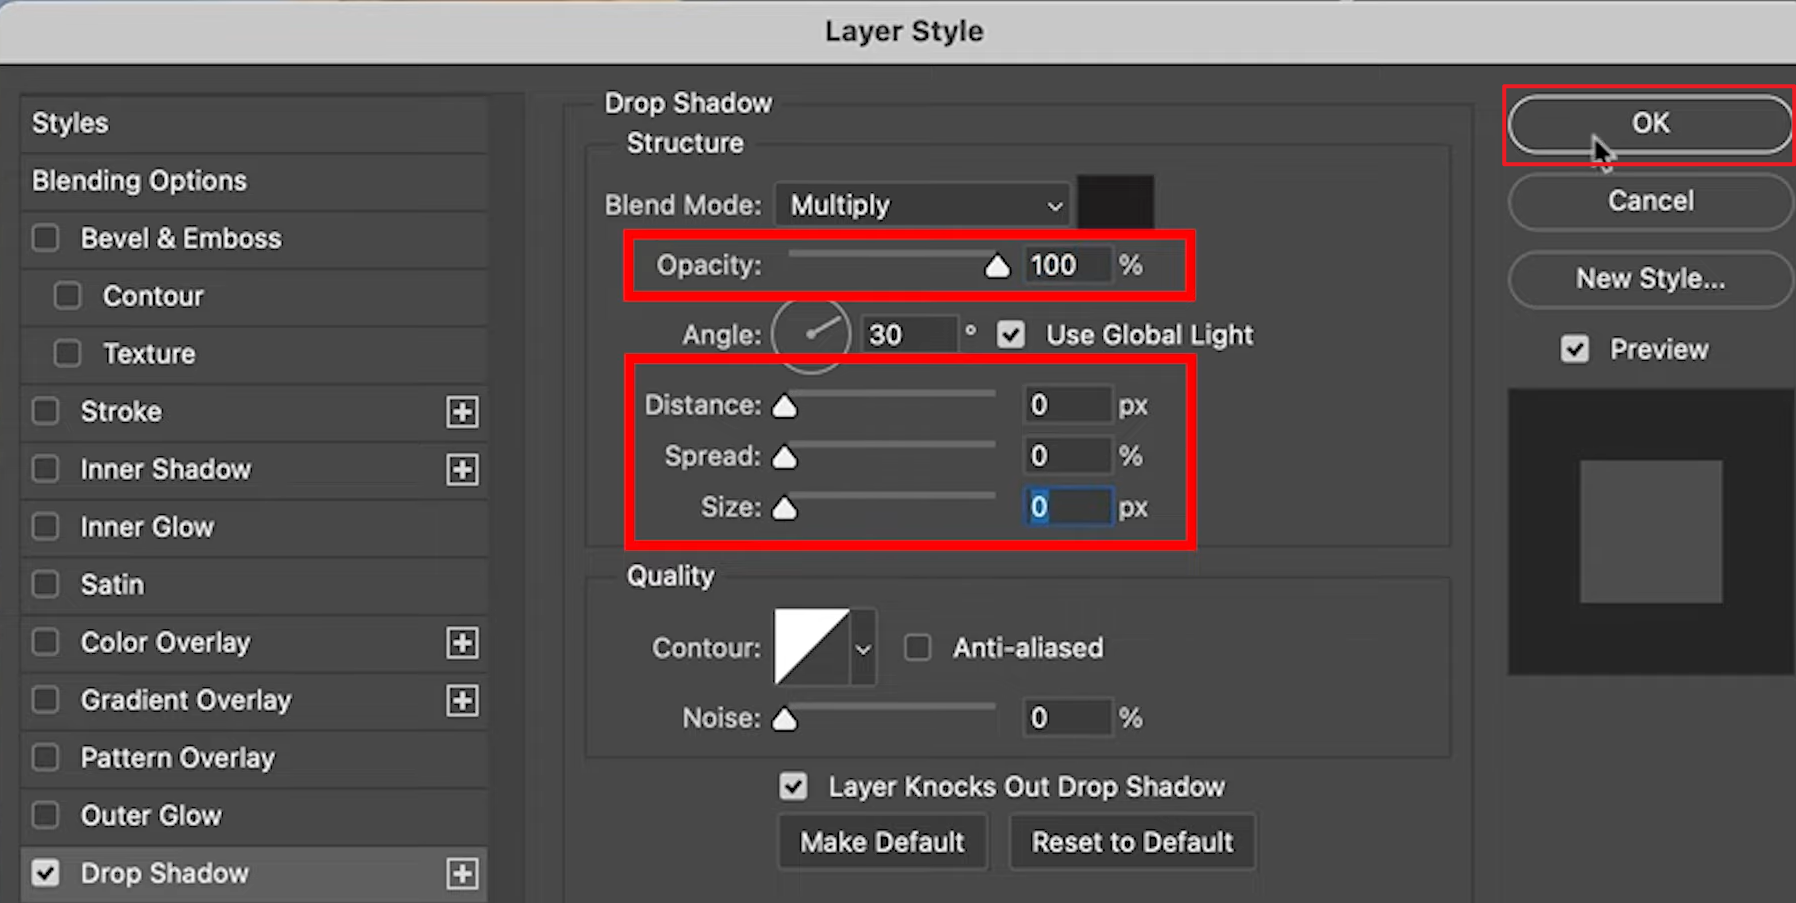
Step 4: Adjust the shadow settings
Modify Opacity, Distance, Spread, and Size until the shadow looks
natural.
A soft shadow often sits around 30–50% opacity with a mild blur
radius.
Step 5: Click OK to apply
Once satisfied, confirm, and the shadow appears behind your element.
My experience:
Drop Shadow is ideal when you need clean, consistent results. I often use it when designing UI mockups because it helps highlight essential elements without manual effort.
Method 2: Custom Shadow with Brush Tool (how to create a natural shadow in Photoshop)
Use this technique when you need full artistic control or when the object requires a softer, more diffused shadow.
Step 1: Create a new layer below
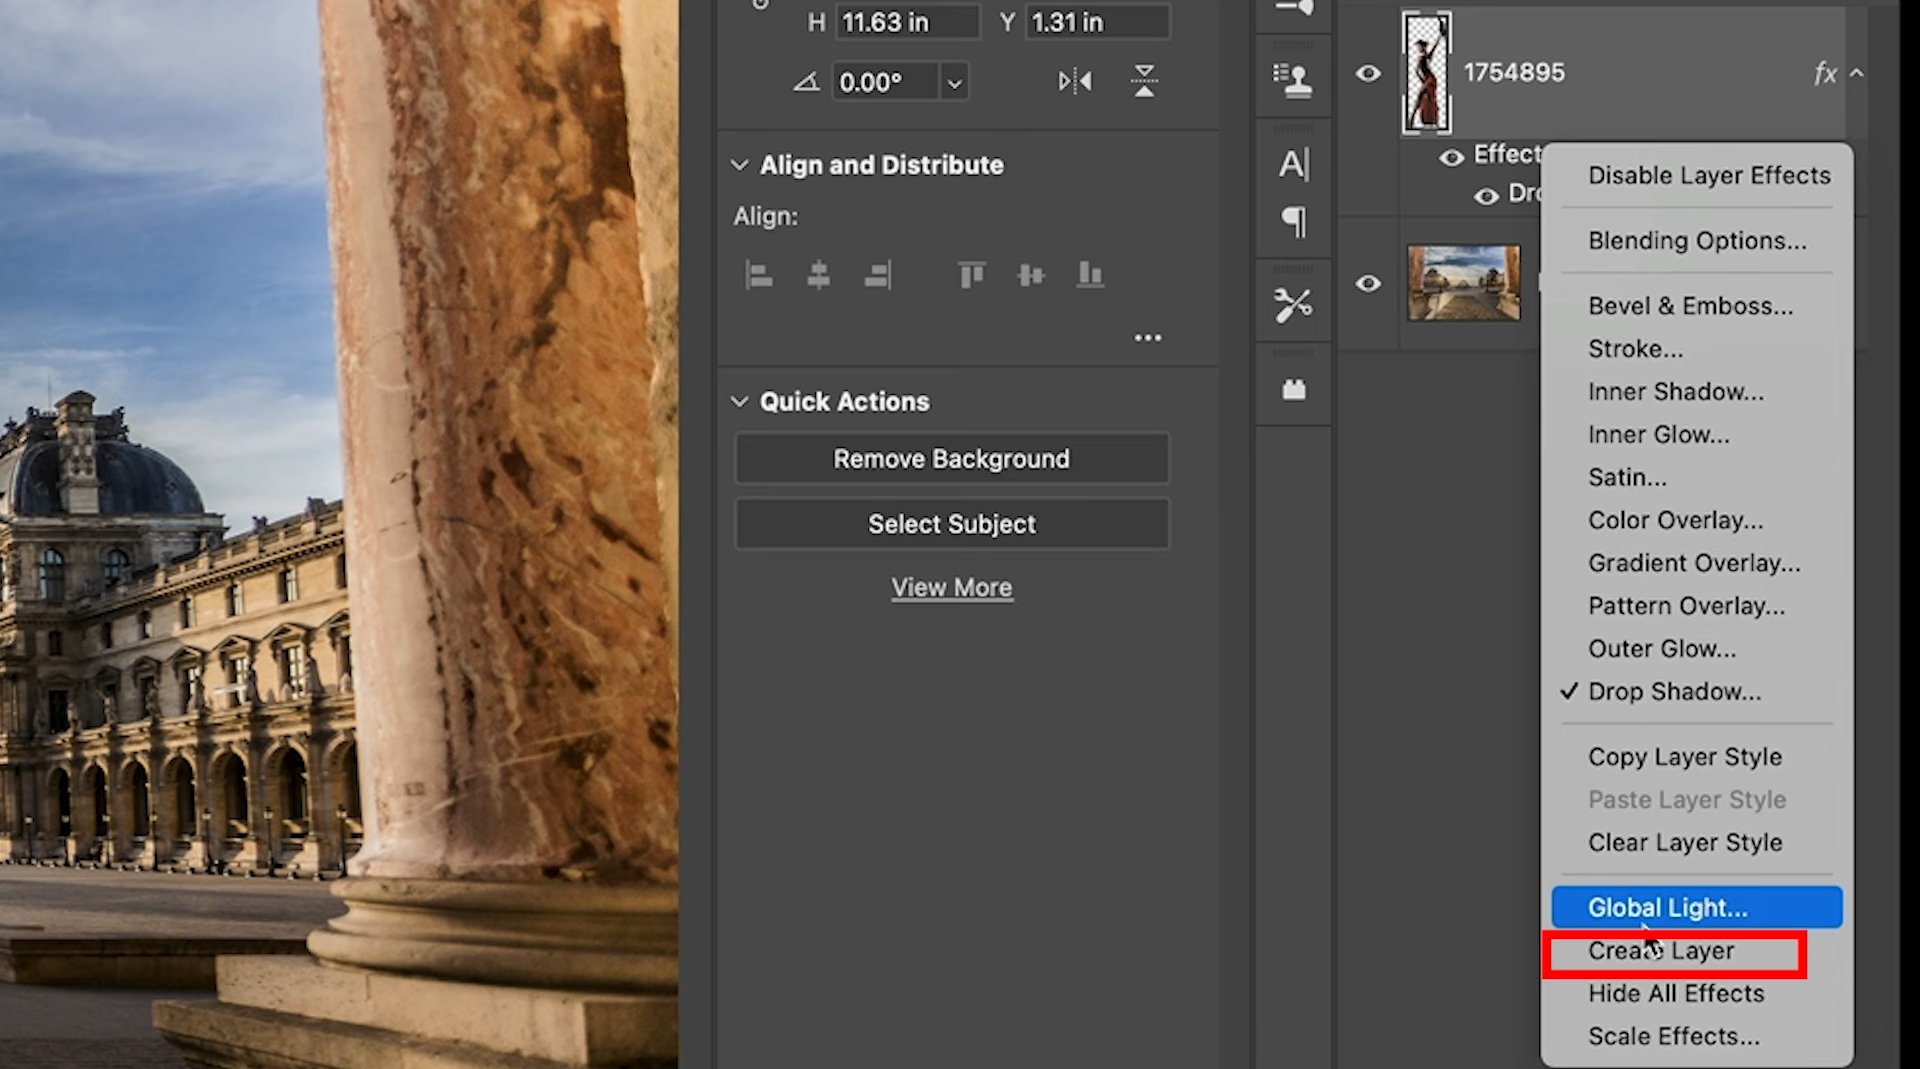
Add a new blank layer under your main object.
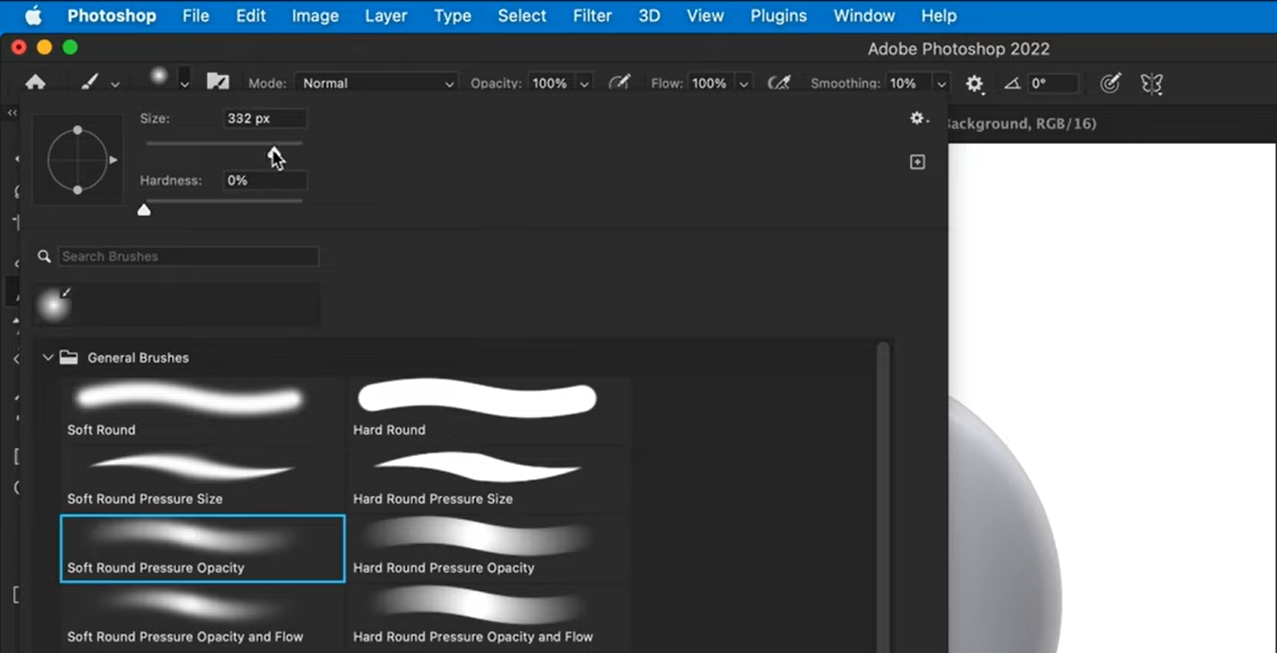
Step 2: Select a soft, round brush
Choose the Brush Tool and pick a large soft brush for smooth edges.
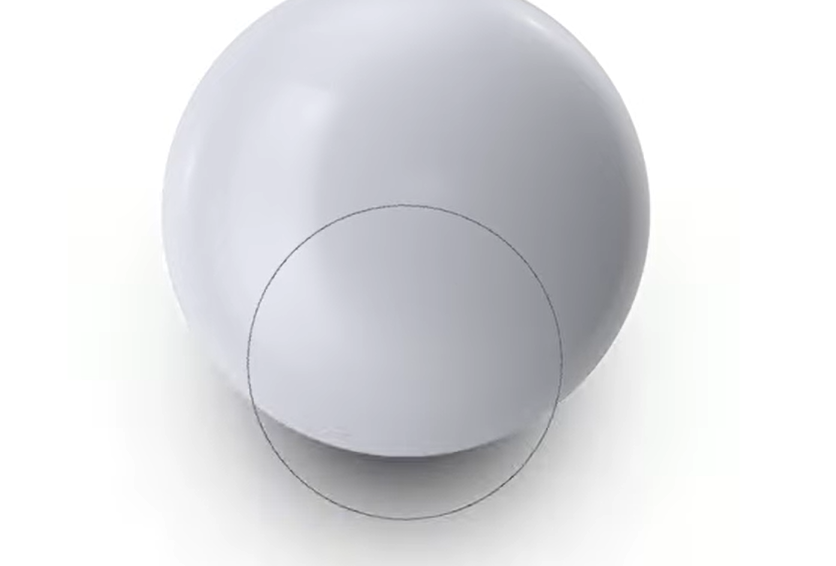
Step 3: Paint the shadow manually
Gently paint where the shadow should fall. Less pressure equals a more natural transition.
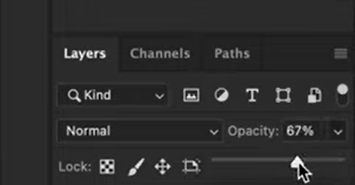
Step 4: Lower the opacity
Reduce the shadow layer’s opacity to avoid harsh, unrealistic tones.
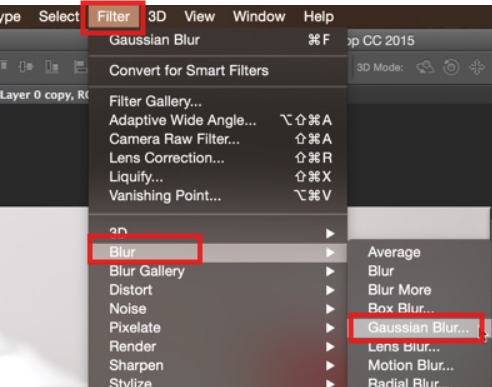
Step 5: Apply Gaussian Blur
Go to Filter > Blur > Gaussian Blur to soften the edges for realism.
My experience:
This method works best when I want to replicate soft environmental shadows, especially for lifestyle images or when refining subtle gradients.
Method 3: Cast Shadow for Realistic Effects (how to add shadow under an object / how to add shadow of a person in Photoshop)
This method creates a long, projected shadow suitable for product photography, portraits, or architectural scenes when learninghow to make a shadow in Photoshop architecture.
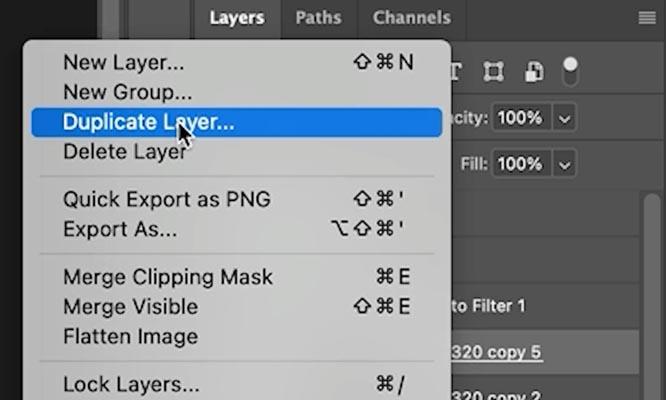
Step 1: Duplicate your object layer
Right-click > Duplicate Layer.
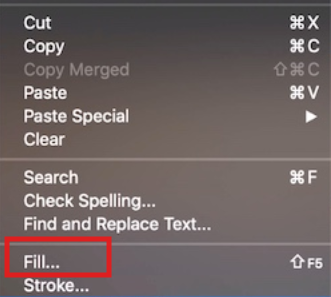
Step 2: Fill it with black
Go to Edit > Fill and select Black.
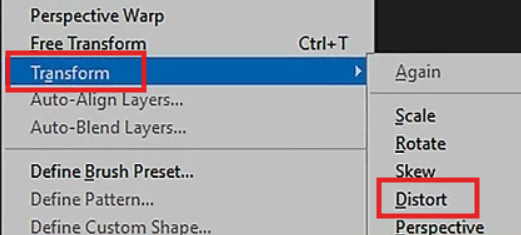
Step 3: Transform the shadow
Use Edit > Transform > Distort to angle and stretch your shadow based on the light source.
Step 4: Add Gaussian Blur
Blur edges for a smoother look.

Step 5: Reduce opacity
Fine-tune the opacity until it blends naturally with the environment.

My experience:
I prefer Cast Shadow for product showcases or portrait editing because it allows me to match shadows realistically. This is also useful if you're comparing workflows across platforms, such as learning how to add shadow in Illustrator or how to add shadow in Canva, since Photoshop still provides the most precision.
Part 2: Common Mistakes & How to Fix Them
Even after learning how to add shadow in Photoshop, many users still face issues with realism and consistency. Below are the most frequent mistakes I see, along with practical solutions to correct them quickly.
Overly Harsh Shadows
A common problem is adding shadows that look too dark or too sharp. This usually happens when opacity or blur settings are not balanced.
How to fix it:
Reduce shadow opacity to around 30–50 percent.
Apply a Gaussian Blur to soften the edges.
If the environment is bright, lighten the shadow slightly for a more natural fade.
My experience:
I notice this mistake often when users attempt to add a shadow under object tutorials for the first time. Starting with lower opacity usually produces a more convincing result.
Incorrect Light Source
If the direction of the shadow doesn’t match the actual light source, it immediately breaks realism.
How to fix it:
Observe the highlights and direction of light in the original image.
Use Edit > Transform > Distort to angle the shadow properly.
Adjust the length based on whether the light is strong (shorter shadow) or low (longer shadow).
My experience:
This becomes especially important when learning how to add a shadow of a person in Photoshop, because human subjects need accurate direction to look believable.
Pixelated Edges
Pixelation occurs when the image resolution is too low or anti-aliasing is disabled when adding a text shadow.
How to fix it:
Work with high-resolution images whenever possible.
Enable Anti-aliasing when applying shadows to text layers.
Add a subtle blur to soften jagged edges.
My experience:
This issue stands out the most when experimenting with how to add shadow in Photoshop text, especially in UI designs or polished layouts.
Flat Appearance
A shadow that lacks tonal variation often looks unrealistic, even if it is positioned correctly.
How to fix it:
Use a Gradient Mask to fade the shadow naturally.
Slightly vary the opacity toward the edges.
Duplicate the shadow layer and change blending modes (Multiply or Overlay) for an extra dimension.
My experience:
This technique helps when working with minimalist compositions, including tasks like how to make shadow in Photoshop architecture, where clean gradients matter.
Color Issues
Shadows are rarely pure black. Depending on the environment, they may contain warm or cool tones.
How to fix it:
For warm lighting, add a slight brown tint to the shadow.
For cool lighting, adjust tone toward blue or grey.
Avoid absolute blacks unless the scene is extremely high contrast.
My experience:
When comparing workflows, I’ve found this detail noticeable in other tools too, such as how to add shadow in Canva or how to add shadow in Illustrator, but Photoshop allows the most precise color control.
Part 3: Refining Your Images: The Role of Enhancement in Final Editing
Even after mastering how to add shadow in Photoshop, the final result often benefits from an enhancement pass. Shadows add depth, but overall clarity, sharpness, and tone balance determine how professional the image looks. This is where an external tool can complement your Photoshop workflow, especially if you want quick improvements without spending extra time on manual adjustments.

Image Enhancer by Toolsmart provides a simple way to refine images after shadow creation. It works directly in the browser, requires no login, and delivers instant improvements, even on photos edited with complex shadow techniques.
Below is a clear breakdown of its main features and how to use them effectively.
Overview
Image Enhancer is a free online tool designed to improve clarity, brightness, and detail in a single click. After creating a shadow in Photoshop, the tool can clean up noise, improve contrast, and make your shadow edges appear more consistent with the overall lighting. If you’re working on products, portraits, or graphics, this quick enhancement step helps the final edit look polished.
Key Features
One-click enhancement
Instantly boosts clarity and detail without additional settings.
No login or watermark
You can improve your images freely without creating an account or dealing with branding overlays.
Mobile-friendly interface
Works smoothly on phones, tablets, and desktops, which is helpful when reviewing shadow edits on the go.
Consistent improvements
Helpful after tutorials like how to create a shadow in Photoshop, as the tool unifies contrast and tone across your composition.
How to Use Image Enhancer
Step 1: Upload your edited photo
Go to the Image Enhancer webpage and upload your photo after adding shadows in Photoshop.

Step 2: Apply enhancement
Click the Enhance button to process the image. The tool analyzes brightness, clarity, and details and improves the image automatically.

Step 3: Review and download
Compare the before-and-after preview. If satisfied, download the enhanced version for final use.

My experience:
Enhancing an image after creating shadows often helps unify the lighting. When I test different shadow methods, Drop Shadow, Brush Tool, or Cast Shadow, I notice Image Enhancer smooths out tonal inconsistencies and boosts clarity without requiring any manual retouching. It’s especially useful when working under deadlines or preparing deliverables where a clean final output matters.
FAQs
Q1: Can I add shadows without Photoshop?
Yes. Basic shadow effects are available in several online tools. Image Enhancer, for example, can improve lighting and contrast, which helps shadows appear more defined. However, if you want full control over how the shadow is shaped, blurred, or angled, Photoshop remains the most precise option.
Q2: Is Image Enhancer free to use?
Yes. Image Enhancer is completely free and does not require a login or account creation. There are no watermarks on the final downloads, which makes it suitable for quick refinements after adding shadows.
Q3: How do I make shadows look natural?
Natural shadows match the direction of the light source. Keep the edges soft using Gaussian Blur, reduce opacity, and avoid using pure black unless the lighting is extremely strong. These steps apply whether you are learning how to add shadow in Photoshop or refining your result using other tools.
Q4: Which tool is best for beginners?
For fast edits and polished output, Image Enhancer is user-friendly and requires no setup. For detailed control, multiple shadow types, and professional results, Photoshop is the better choice—especially when learning how to create a shadow in Photoshop with accuracy.
Summary
Learning how to add shadow in Photoshop is essential for producing images with depth and realism. Whether you use Drop Shadow for text, custom brushes for softer shading, or Cast Shadow for more dramatic effects, Photoshop provides precise tools to shape and adjust your results. Understanding common mistakes, such as mismatched light direction, harsh edges, or flat shadow tones, helps ensure a more polished outcome.
After applying your shadow, tools like Image Enhancer can improve clarity, unify lighting, and elevate the final look with minimal effort. Combining Photoshop’s control with one-click enhancement creates a clean, professional finish for product photos, graphics, and digital compositions.

